Ever thought about sprouting? The first time I ever sprouted was in a Nalgene drinking bottle while on a canoe trip in Labrador. We had to cuddle with the Nalgene in our sleeping bags at night so the sprouts wouldn’t get too cold, but it was worth it to have fresh salad every week on a 42-day trip. I’ve sporadically sprouted in bursts of enthusiasm since then — not so much because it is difficult by any means, but more that I’m not organized enough to start the next batch before the previous one is ready so that we have a constant supply. Rest assured — it's a fun and easy way to pack a lot of nutrition into a tiny seed!
Containers for sprouting
The glass jar method of sprouting is the easiest to get started with and is all I generally use. I inherited an aluminum colander sprouter from my mother, but the holes in it are too large for small seeds so it is really only good for bean sprouts. If you get serious about your sprouts, you may want to graduate to more sophisticated methods such as a bamboo basket, a sprout bag, a colander, or even an automatic sprouter. You can grow larger, stronger sprouts in them, the sprouts have more equal access to light, and there are fewer risks of mold (though I have only ever had mold develop once in my jar).
Sprouting nutrition and speed
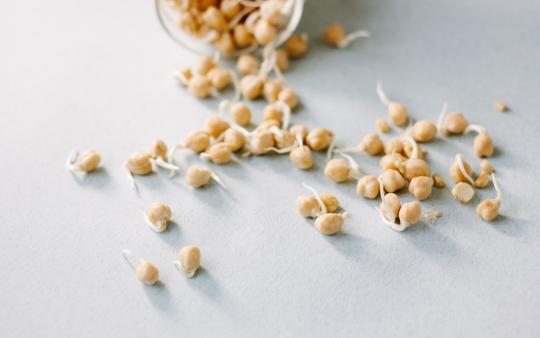
In the first 5 to 10 days of growth, plants reach their maximum nutrient density. They are full of enzymes, minerals, vitamins and protein. That means your tiny baby sprouts pack way more nutrients in them pound for pound than their full-grown peers at the grocery store. The time to maturity varies per seed type, but is generally achieved when the bud opens up into a left and right petal.
Sprouts to start with
5 to 6 days to maturity:
- radish
- mustard
7 days to maturity:
- alfalfa
- clover
8 to 12 days to maturity
- mung bean
- adzuki bean
You can sprout it in a jar
(You can sprout it in a car…)
- Sterilize a 500 ml glass jar
- Place about 1-2 tbsp of sprouting seeds in the bottom of it
- Secure cheesecloth over jar opening with an elastic
- Rinse seeds a couple of times
- Cover with 3-4 times their depth in water
- Let soak 8 hours to overnight
- Drain the water
- Refill with water, swish around gently, and drain well 2 times a day
It’s best if you can prop the jar on an angle upside down so that it drains, but air can still get in between each rinsing.
What do I do with 'em?
Mix your sprouts into a salad, stack them on a sandwich, or even throw a handful into a smoothie. They are delicious in stir-fry, soup, or integrated into a pasta sauce. If you get into sprouting larger beans than mung or adzuki (such as garbanzo, soy, navy, pinto, kidney and green pea), they will be too tough to be eaten raw and need to be broken down by boiling or steaming before eating. If you’re using the kinds that don’t require cooking but you want them in your hot meal, I recommend doing it for the shortest time possible as they will lose some of their nutritional punch. You can save most of it if you add them during the last minute of cooking, or after the pan is off the heat, just to bring them up to the temperature of the rest of the meal.
Sprouts have been touted as a health food for decades — the Chinese have been growing them for over 5,000 years! — and they seem to enjoy the same bursts of enthusiasm in the marketplace as they do in my kitchen. Companies selling a variety of sprouts and baby greens abound these days, and they are quite readily accessible, but growing your own is way more economical and really takes hardly any time or space at all. It’s a super easy and fun project to do with your kids and, as a bonus, may get them to up their intake of greens!


