


Giving can warm the soul more than anything received.
Especially when you thoughtfully craft a gift with your own hands. As more families are stepping back from the high consumerism of holiday gift-giving, we look toward handmade, meaningful gifts that we can give to our children and loved ones.
As the days get shorter and colder, we may feel ourselves needing extra warmth to get through our day. We can give that warmth emotionally in the form of a small, heartfelt gift.
A Sustainable and Handmade Gift
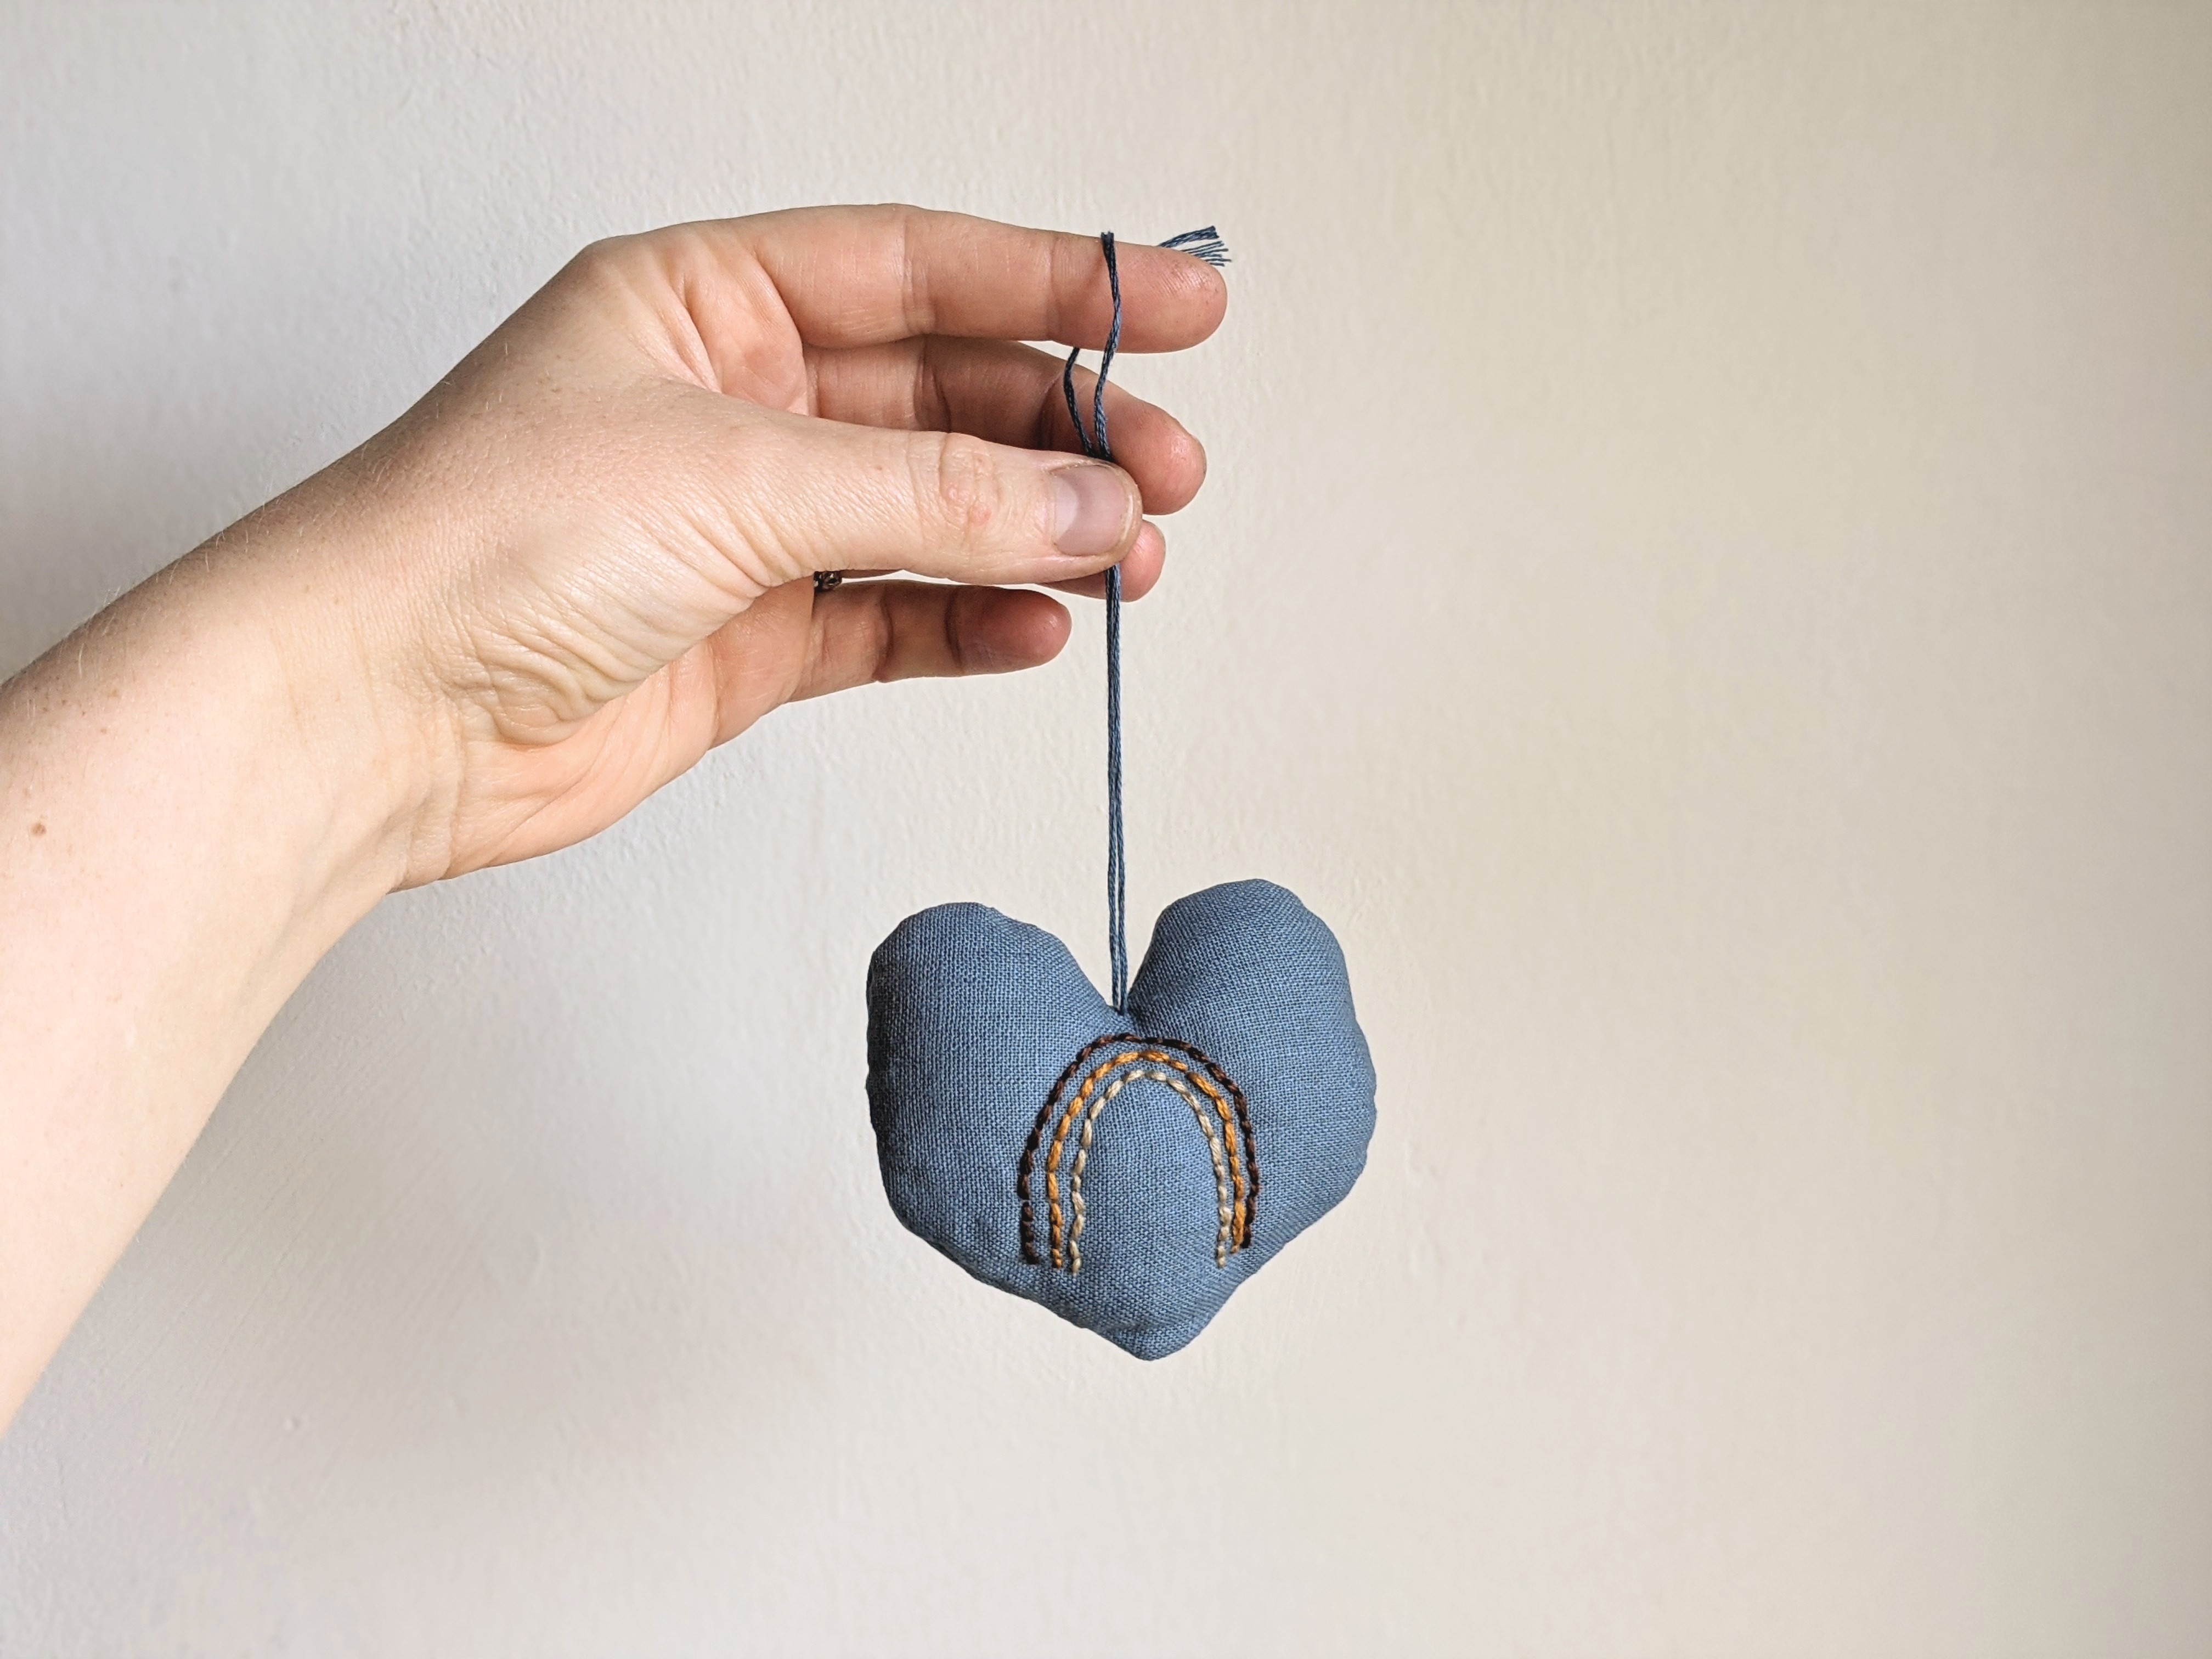
I have been making these little pocket heart ornaments for years and given them to friends as holiday gifts. I write a short note, like "Happy Holidays" or "Merry Christmas" in December, or "You are special," "Love U," or any other greeting or sentiment that may suit the moment.
This tutorial will help you create a 3" plush heart with a little slip pocket on the back to hold a special note. You may choose to add a string loop to be used as an ornament or leave it as is, and it can be stored in a pocket or stashed under a pillow. The best part about this craft is that it can be entirely made out of scraps of fabric you have around the house. I like to stuff mine with sheep's wool and dried lavender, but you could stuff them with scrap yarn, strips of cloth, dried fir tree needles, or any other dried herb.
Materials & Tools
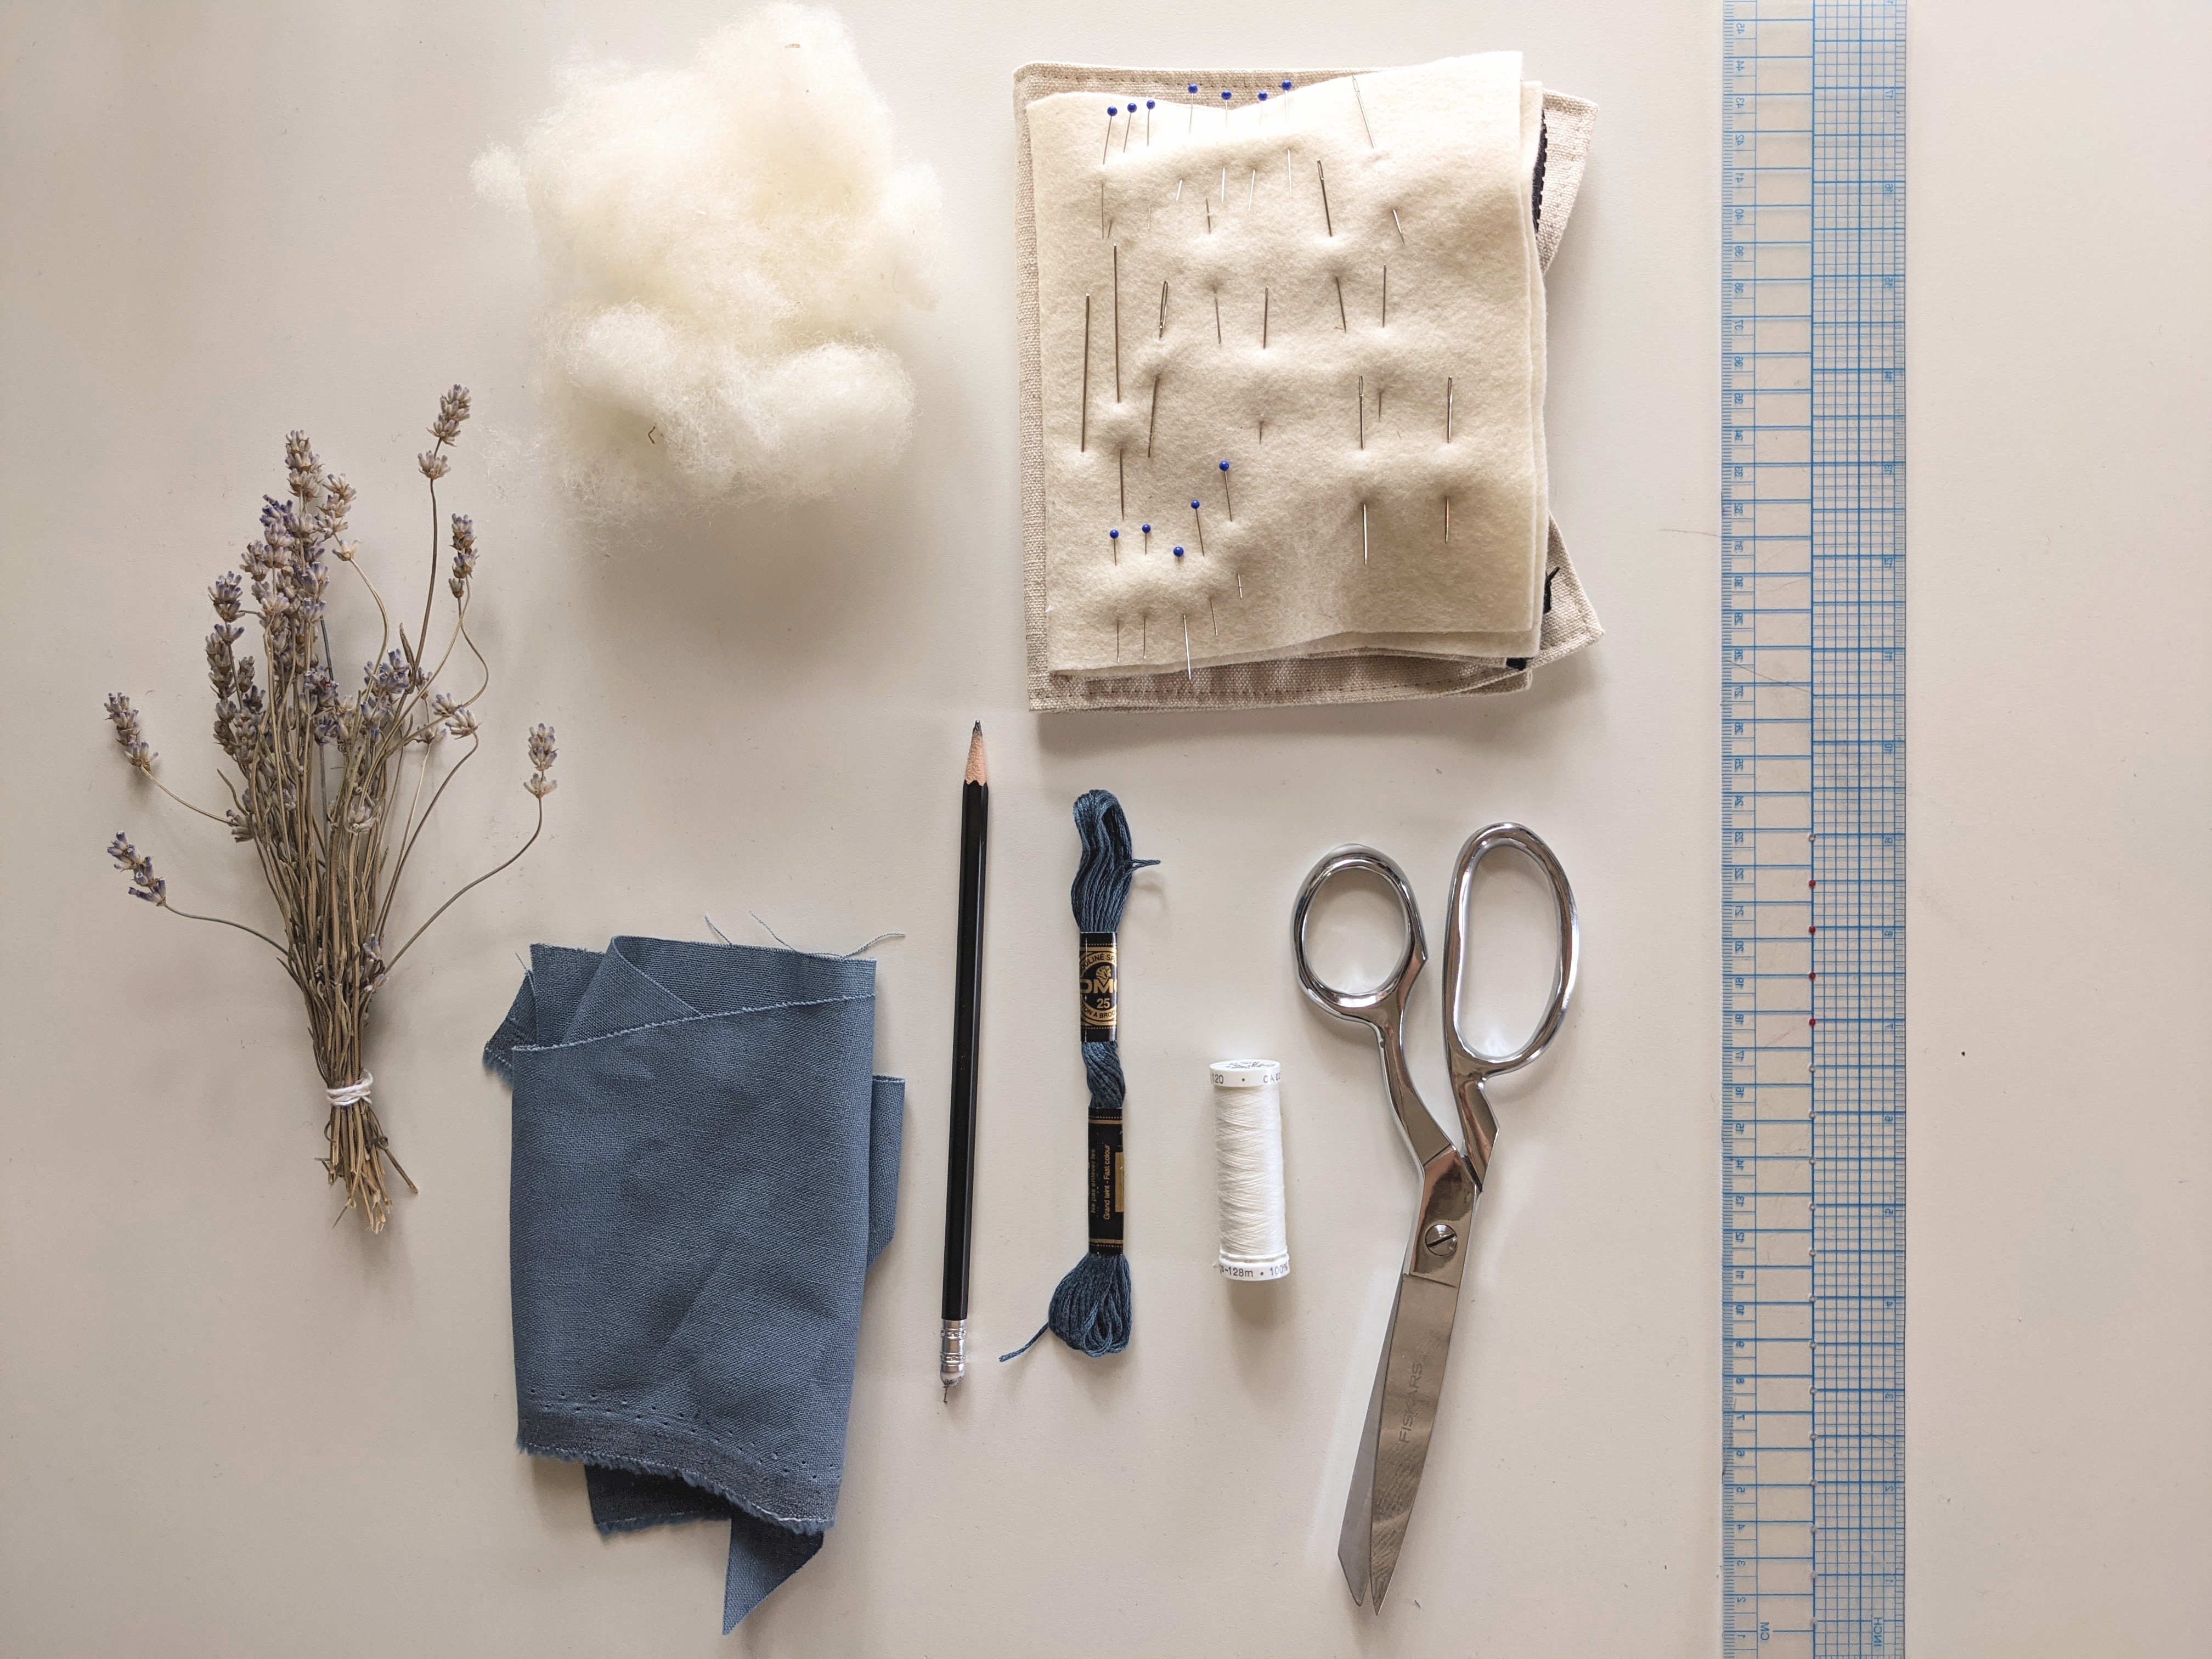
- Fabric (at least 8” x 7”)
- Filling (wool, yarn, fabric scrap strips, dried lavender, other dried herbs)
- All-purpose thread in coordinating colour
- String in coordinating colour for ornament loop (*optional)
- Fabric scissors
- Pencil
- Sewing needle and pins
- Ruler
- Sewing machine (*optional)
Instructions
1. Cut two 4" x 4" squares and one 4" x 2 3/4" rectangle from the fabric of your choice.
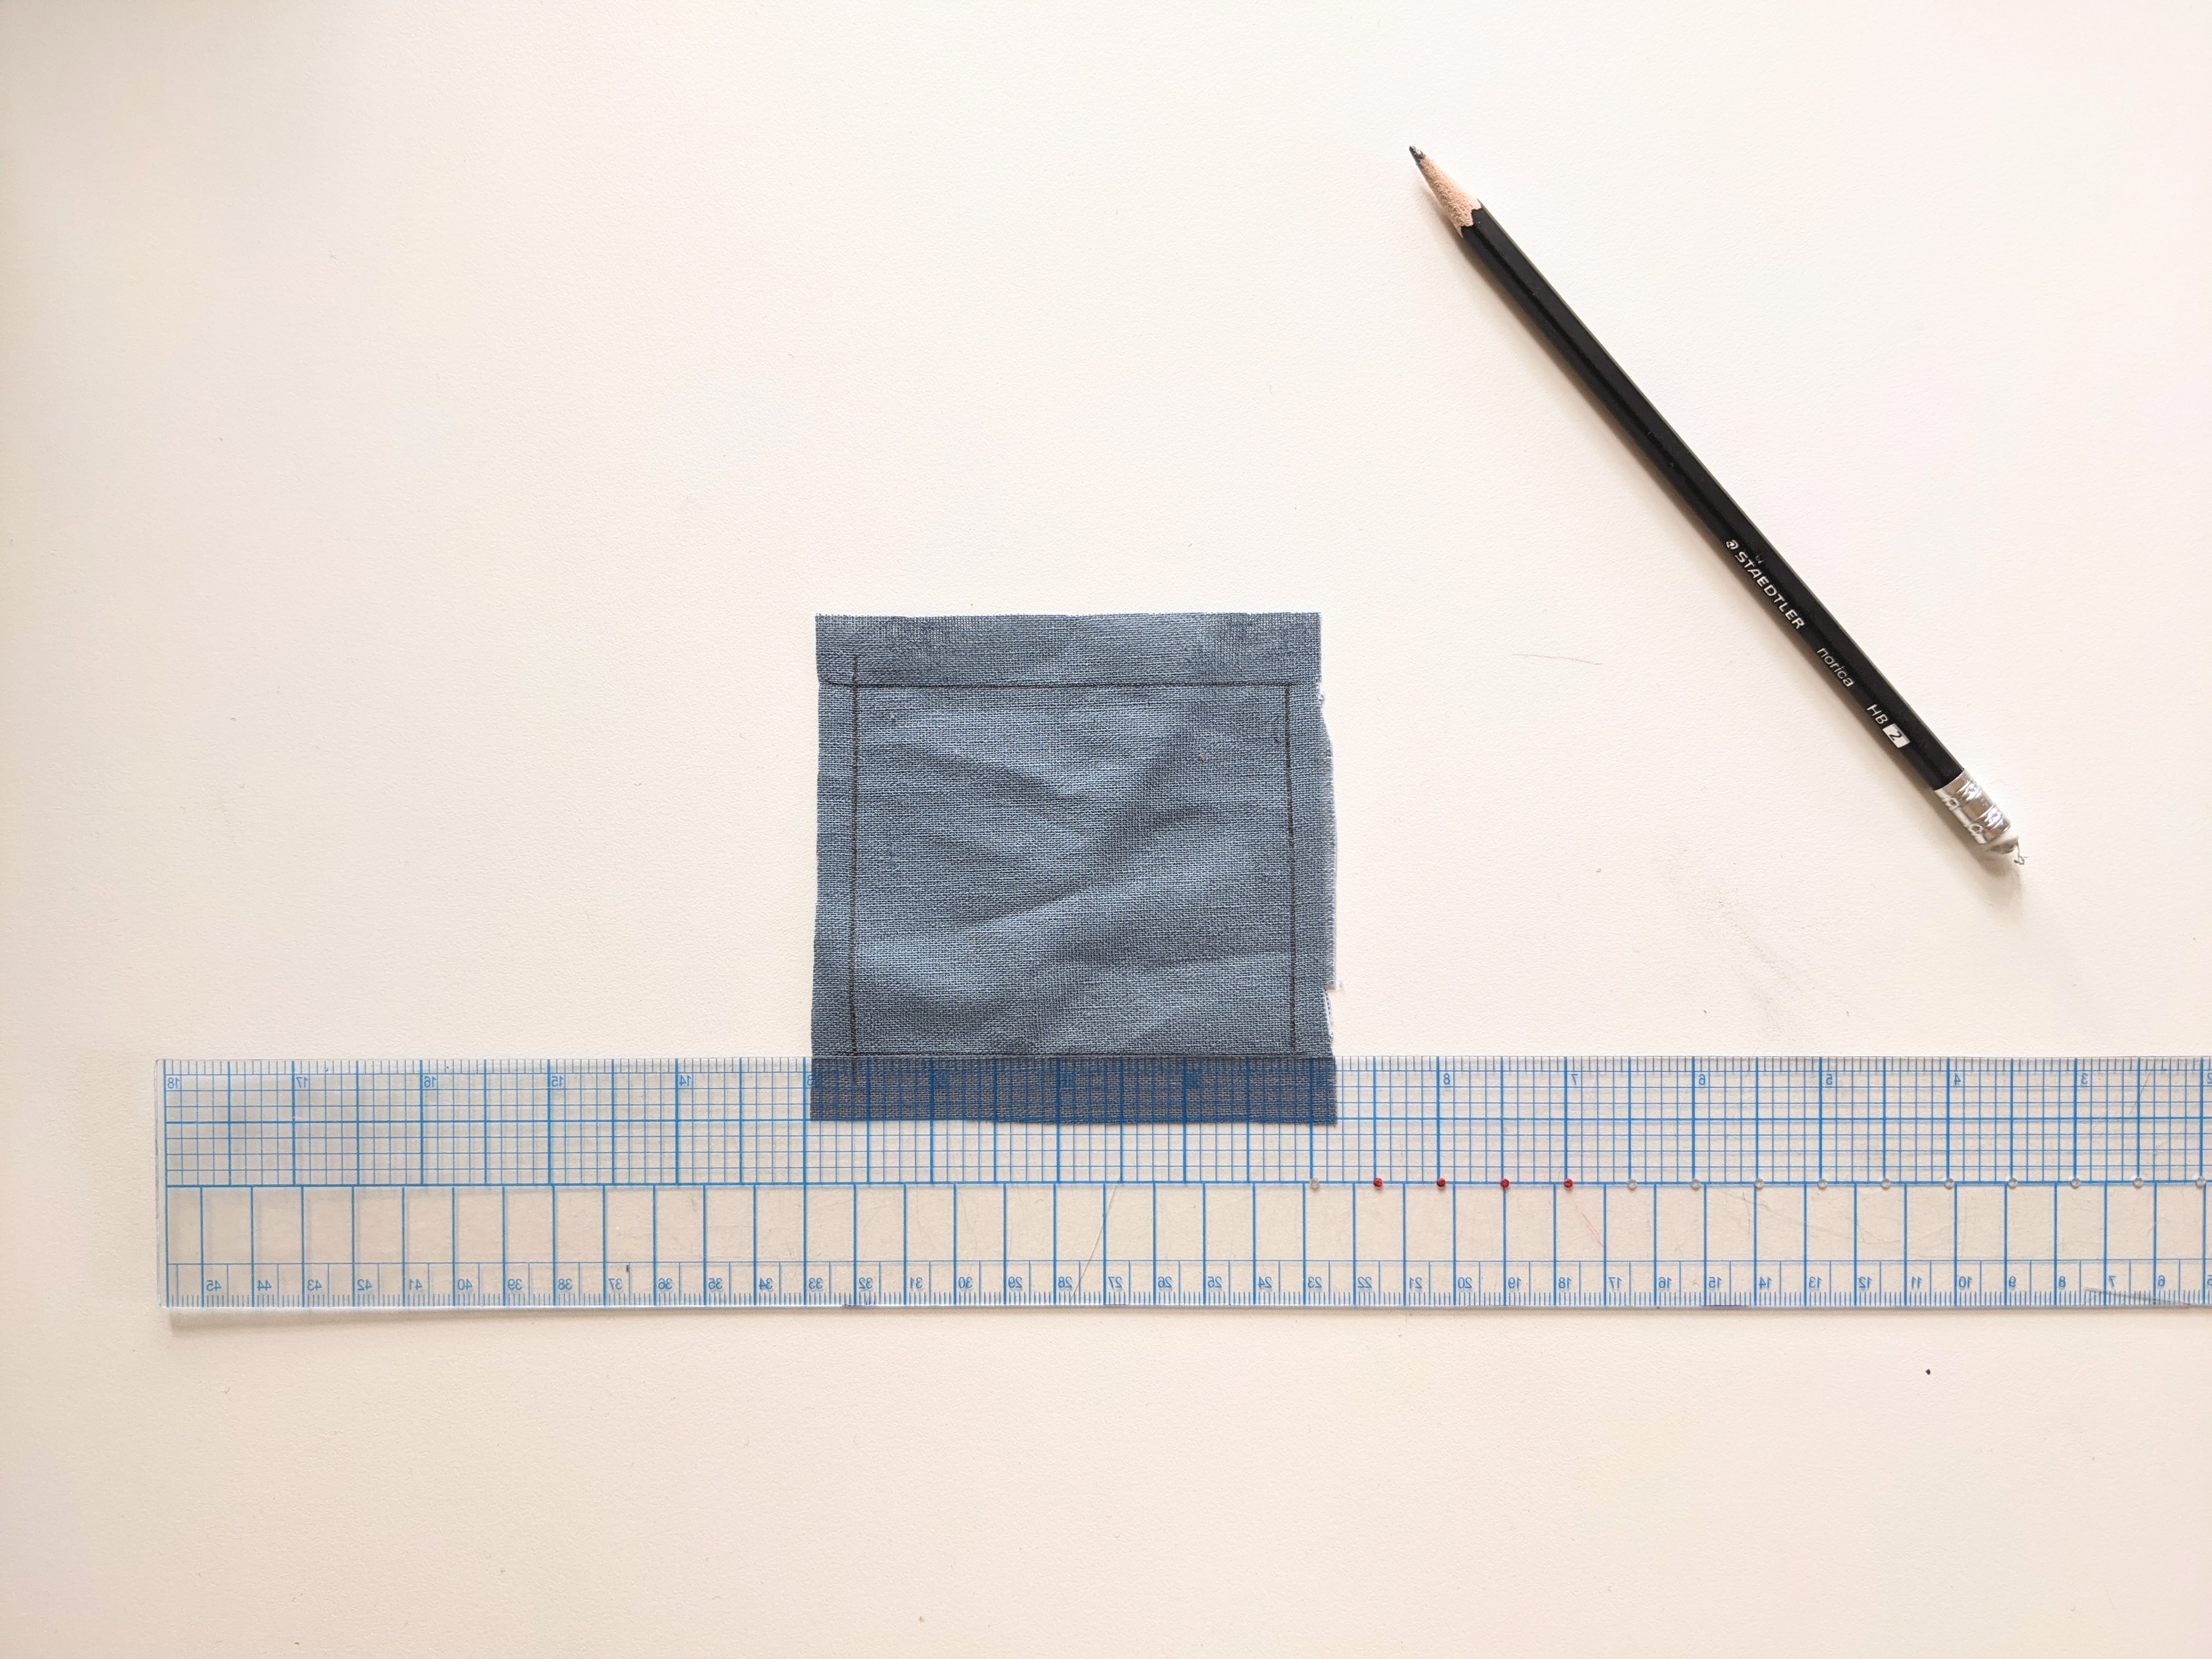
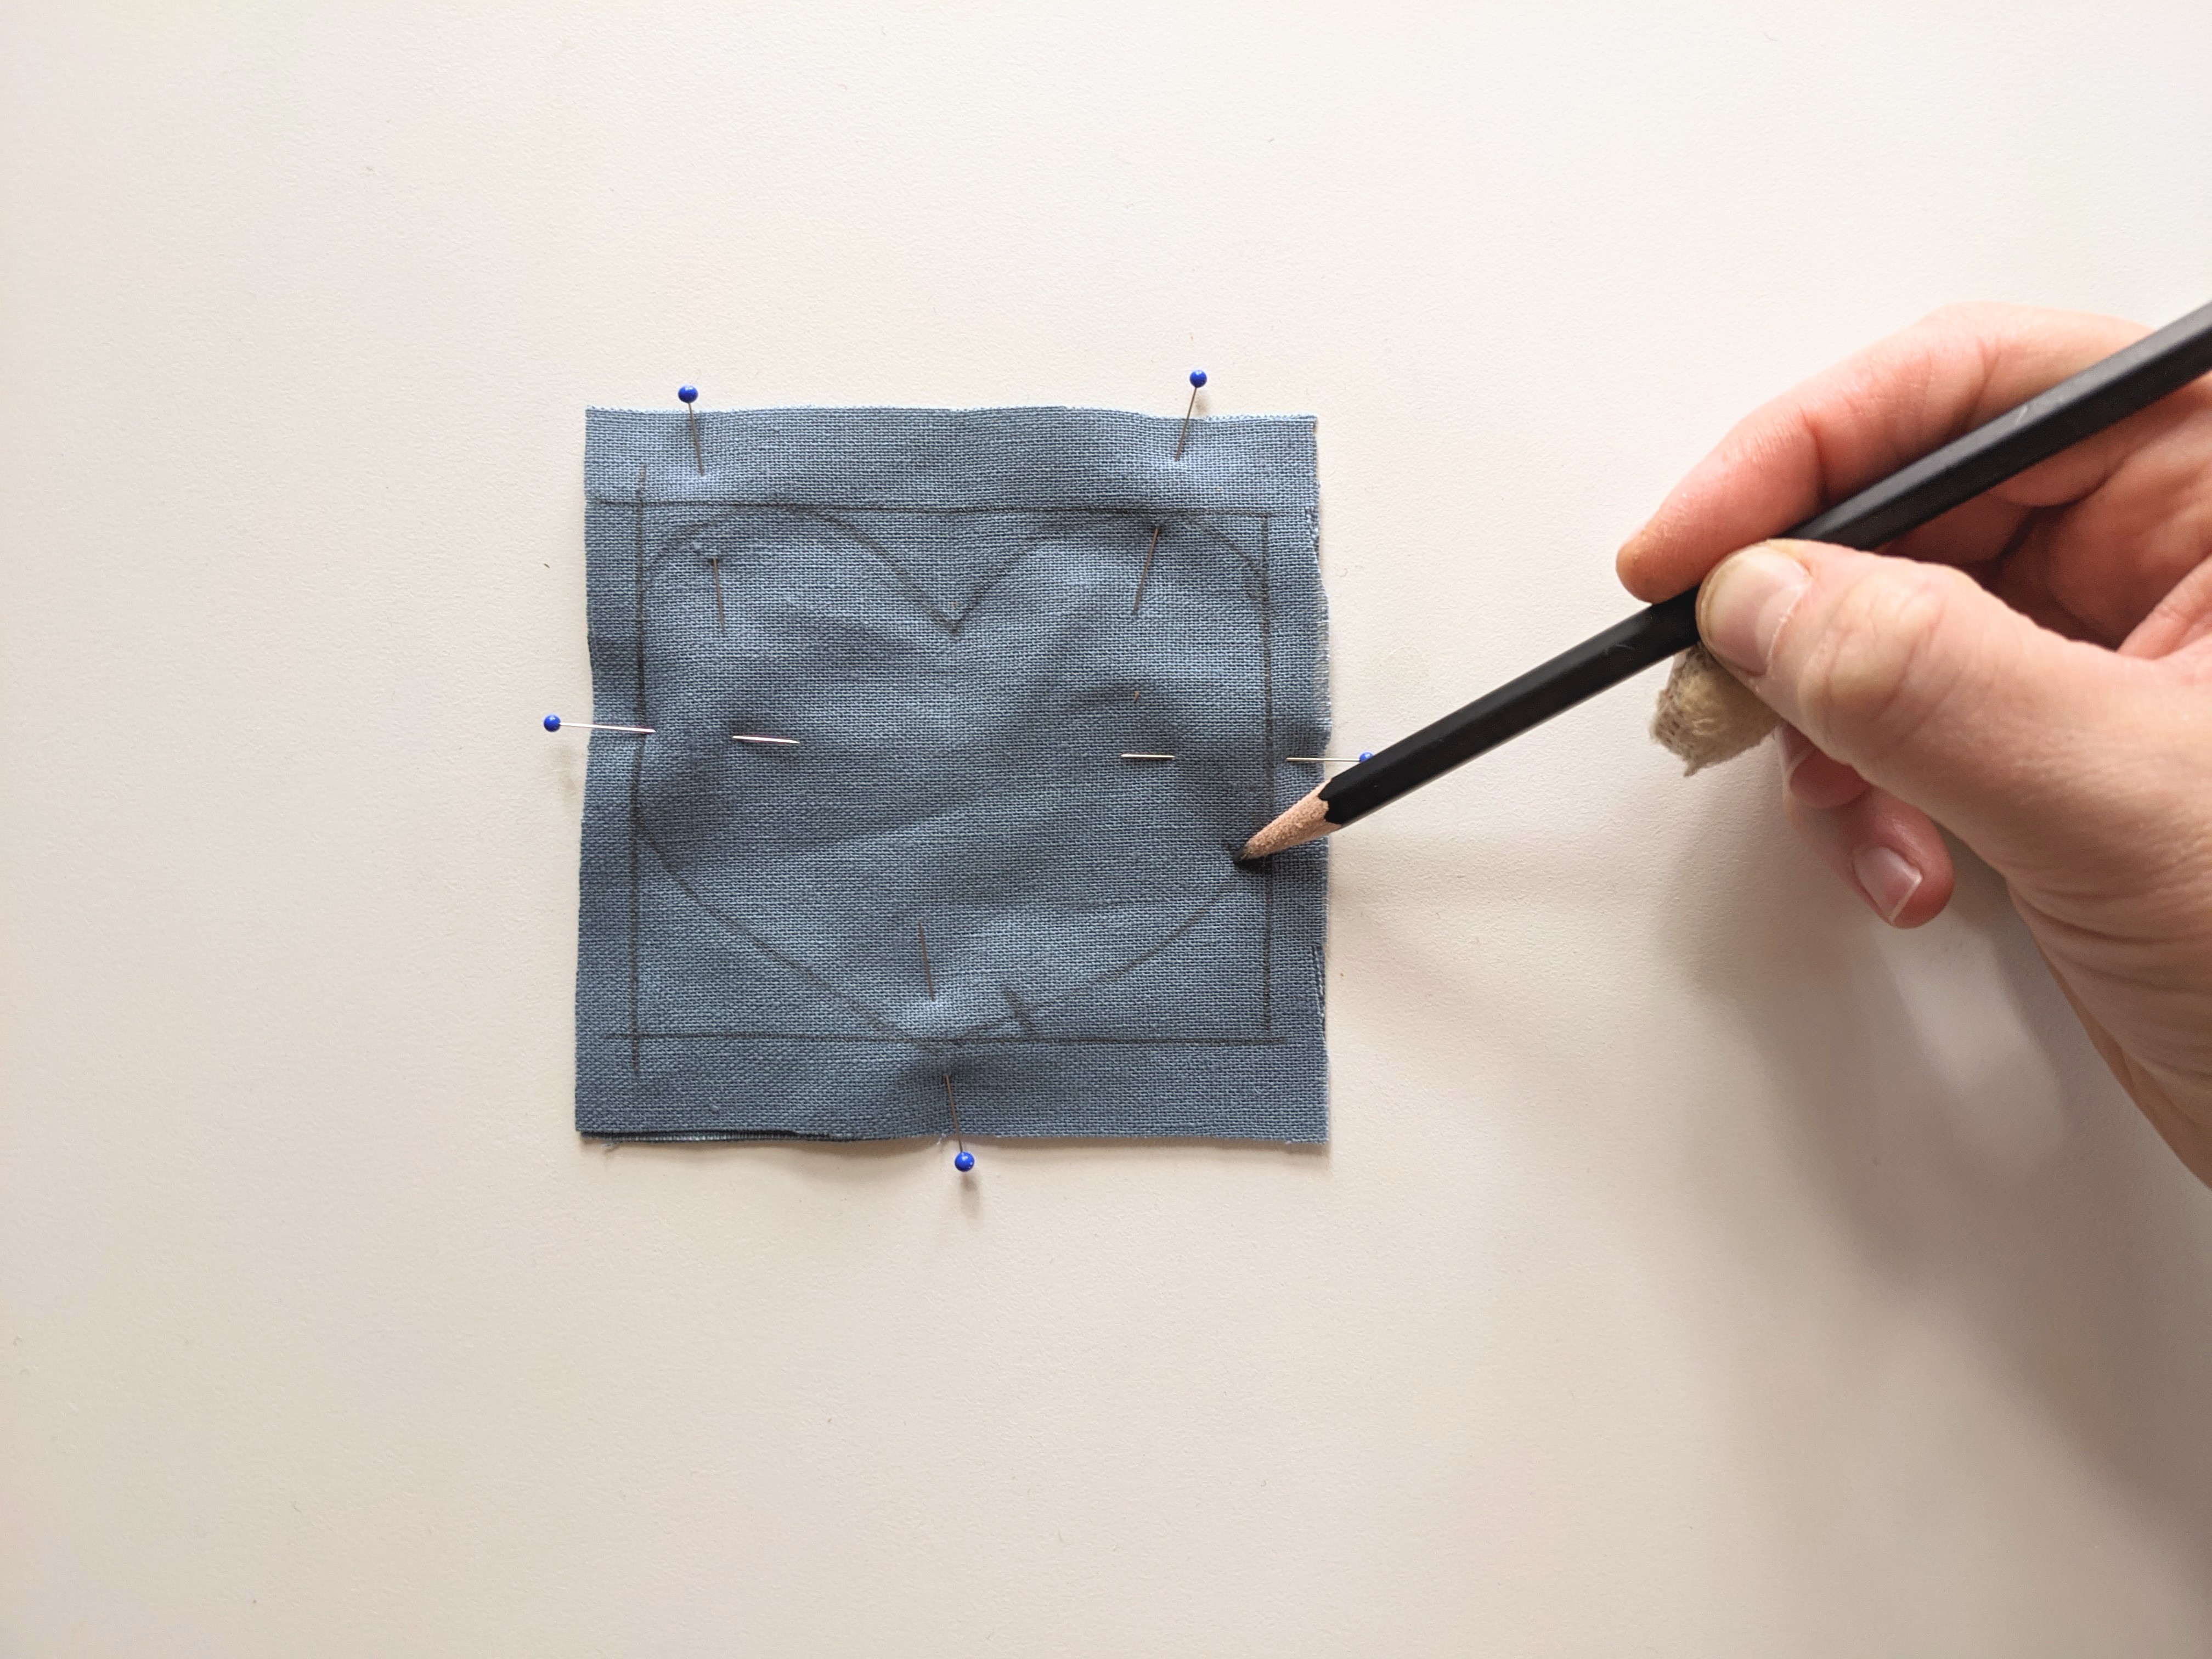
2. Starting with one of the 4”x4” squares, mark a 3.5” wide by 3” tall rectangle in the middle of the fabric. You should have about 1/4" seam allowance on each side of the heart and about 1/2" seam allowance above and below the heart.
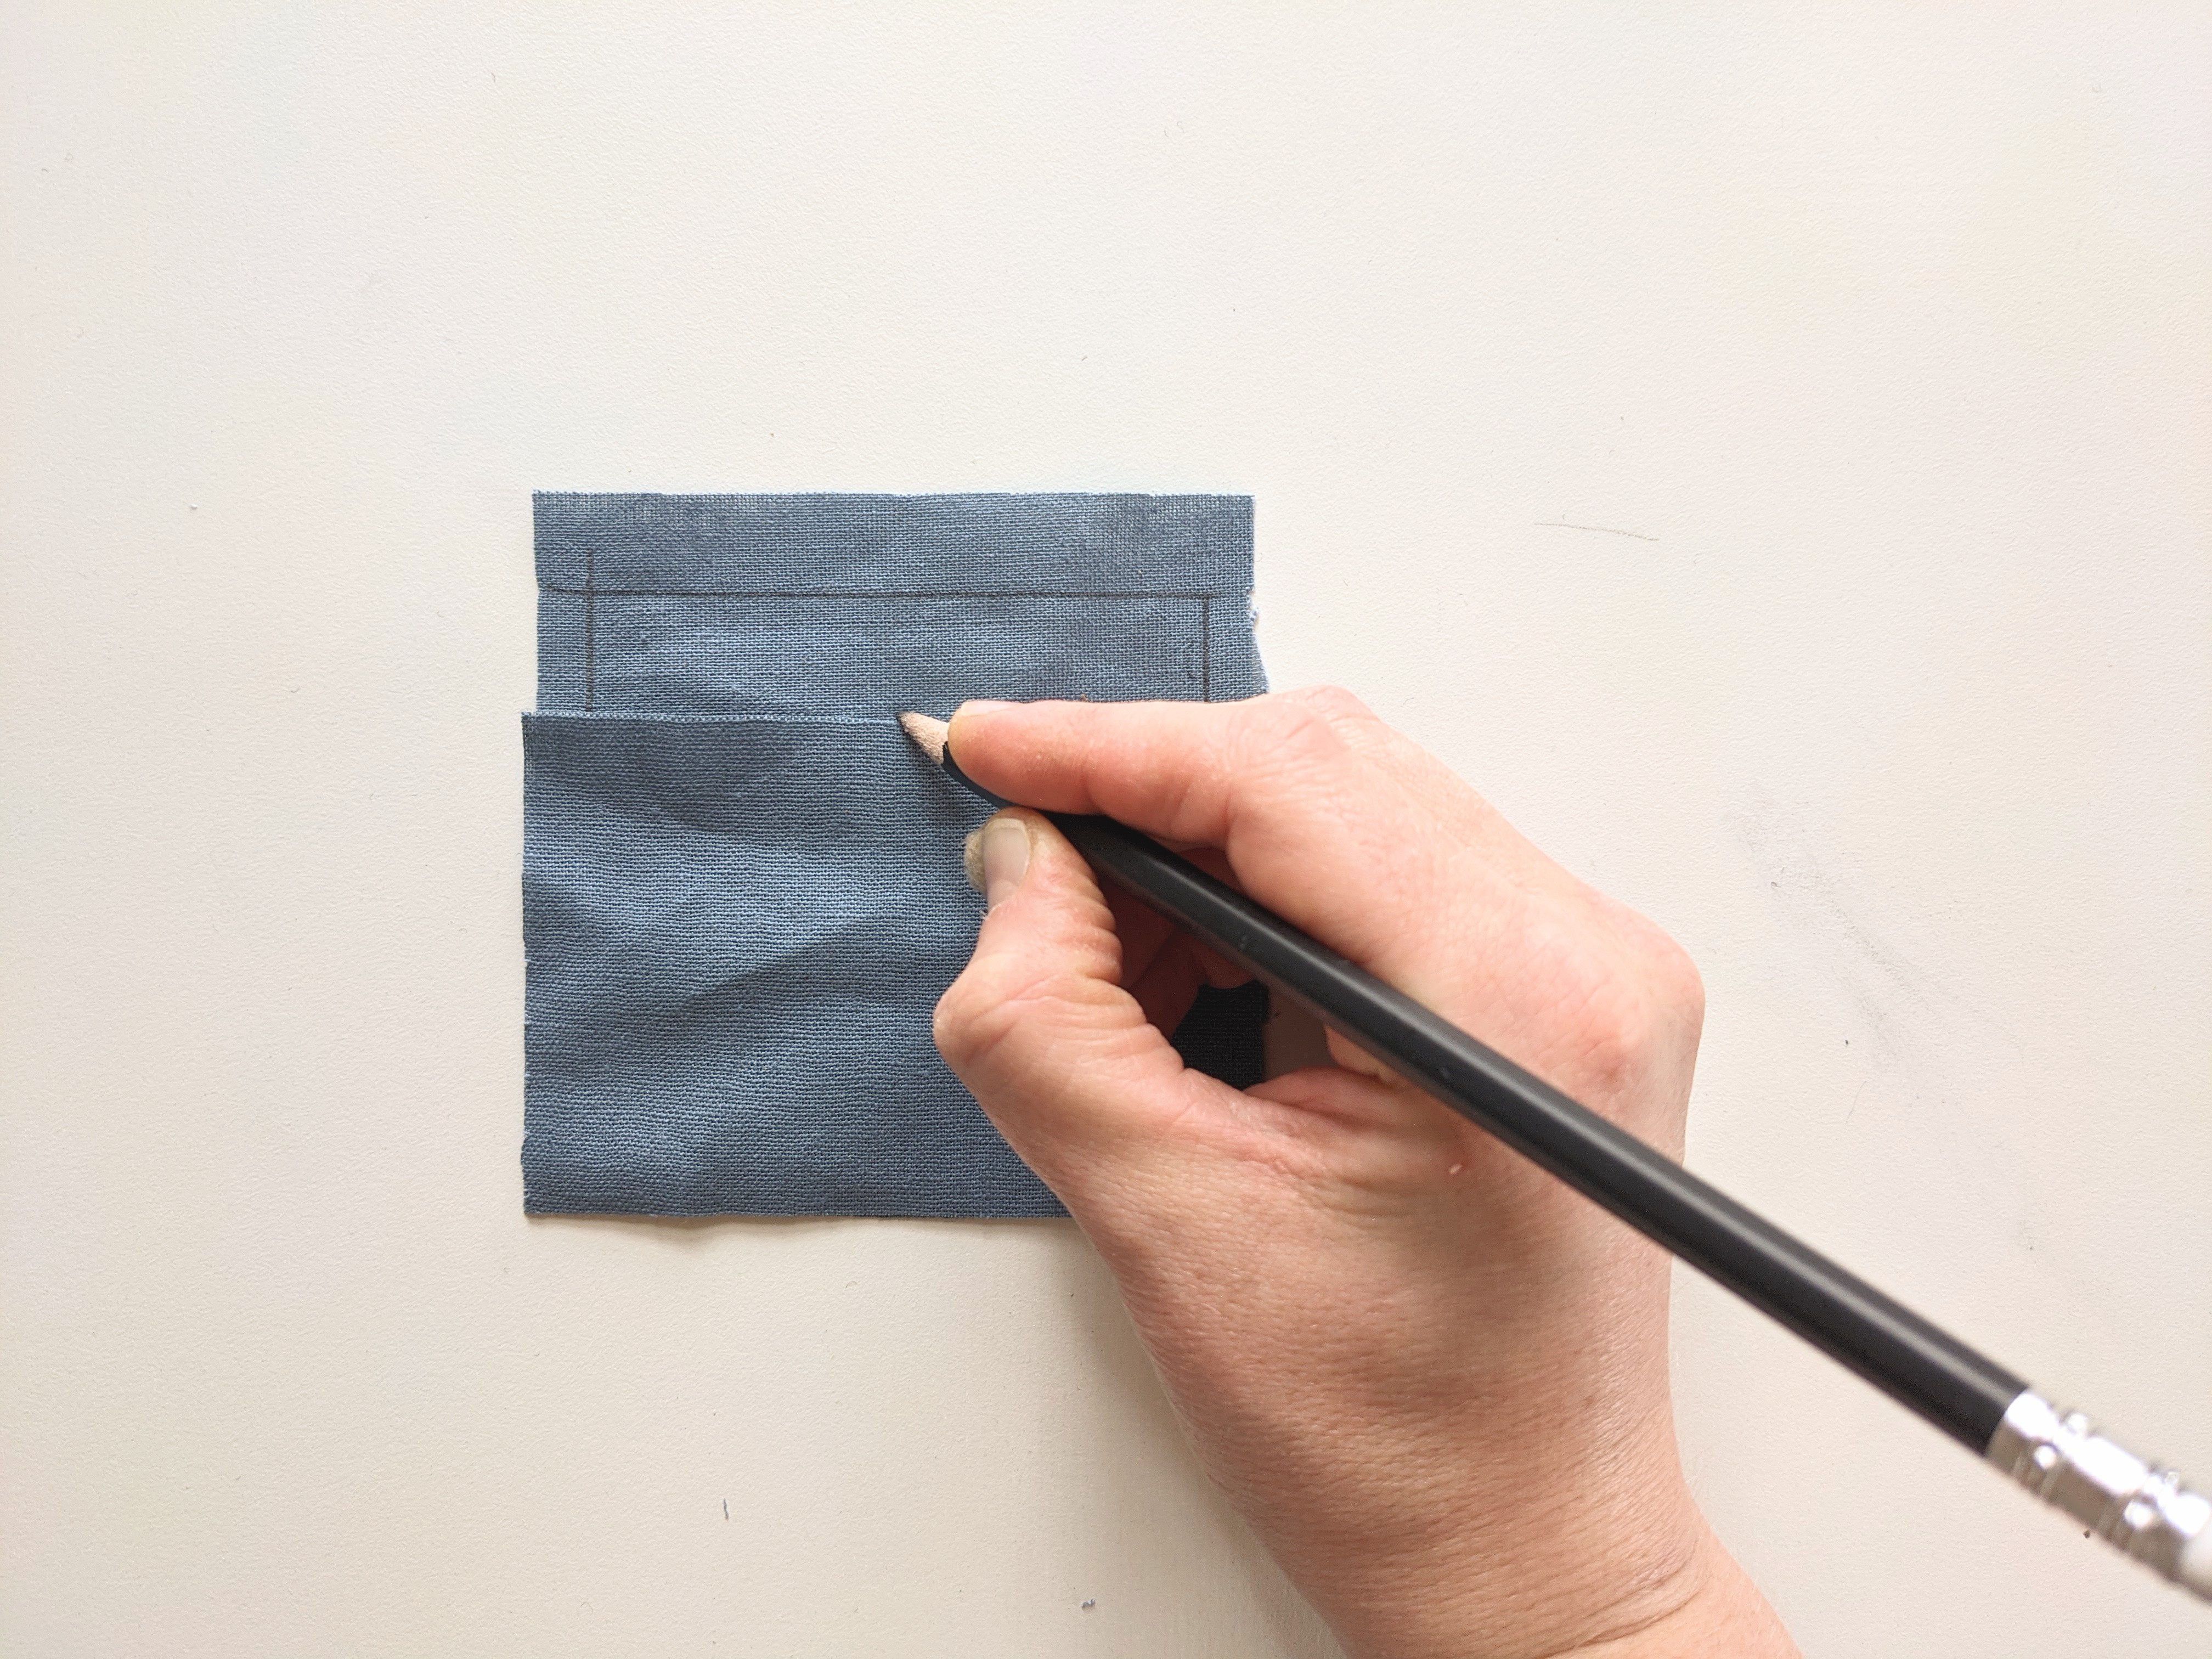
3. Mark how low the dip of the heart shape should go by placing the rectangle of fabric, bottom edges aligned, and mark the top edge of the rectangle centred on the bottom square fabric.
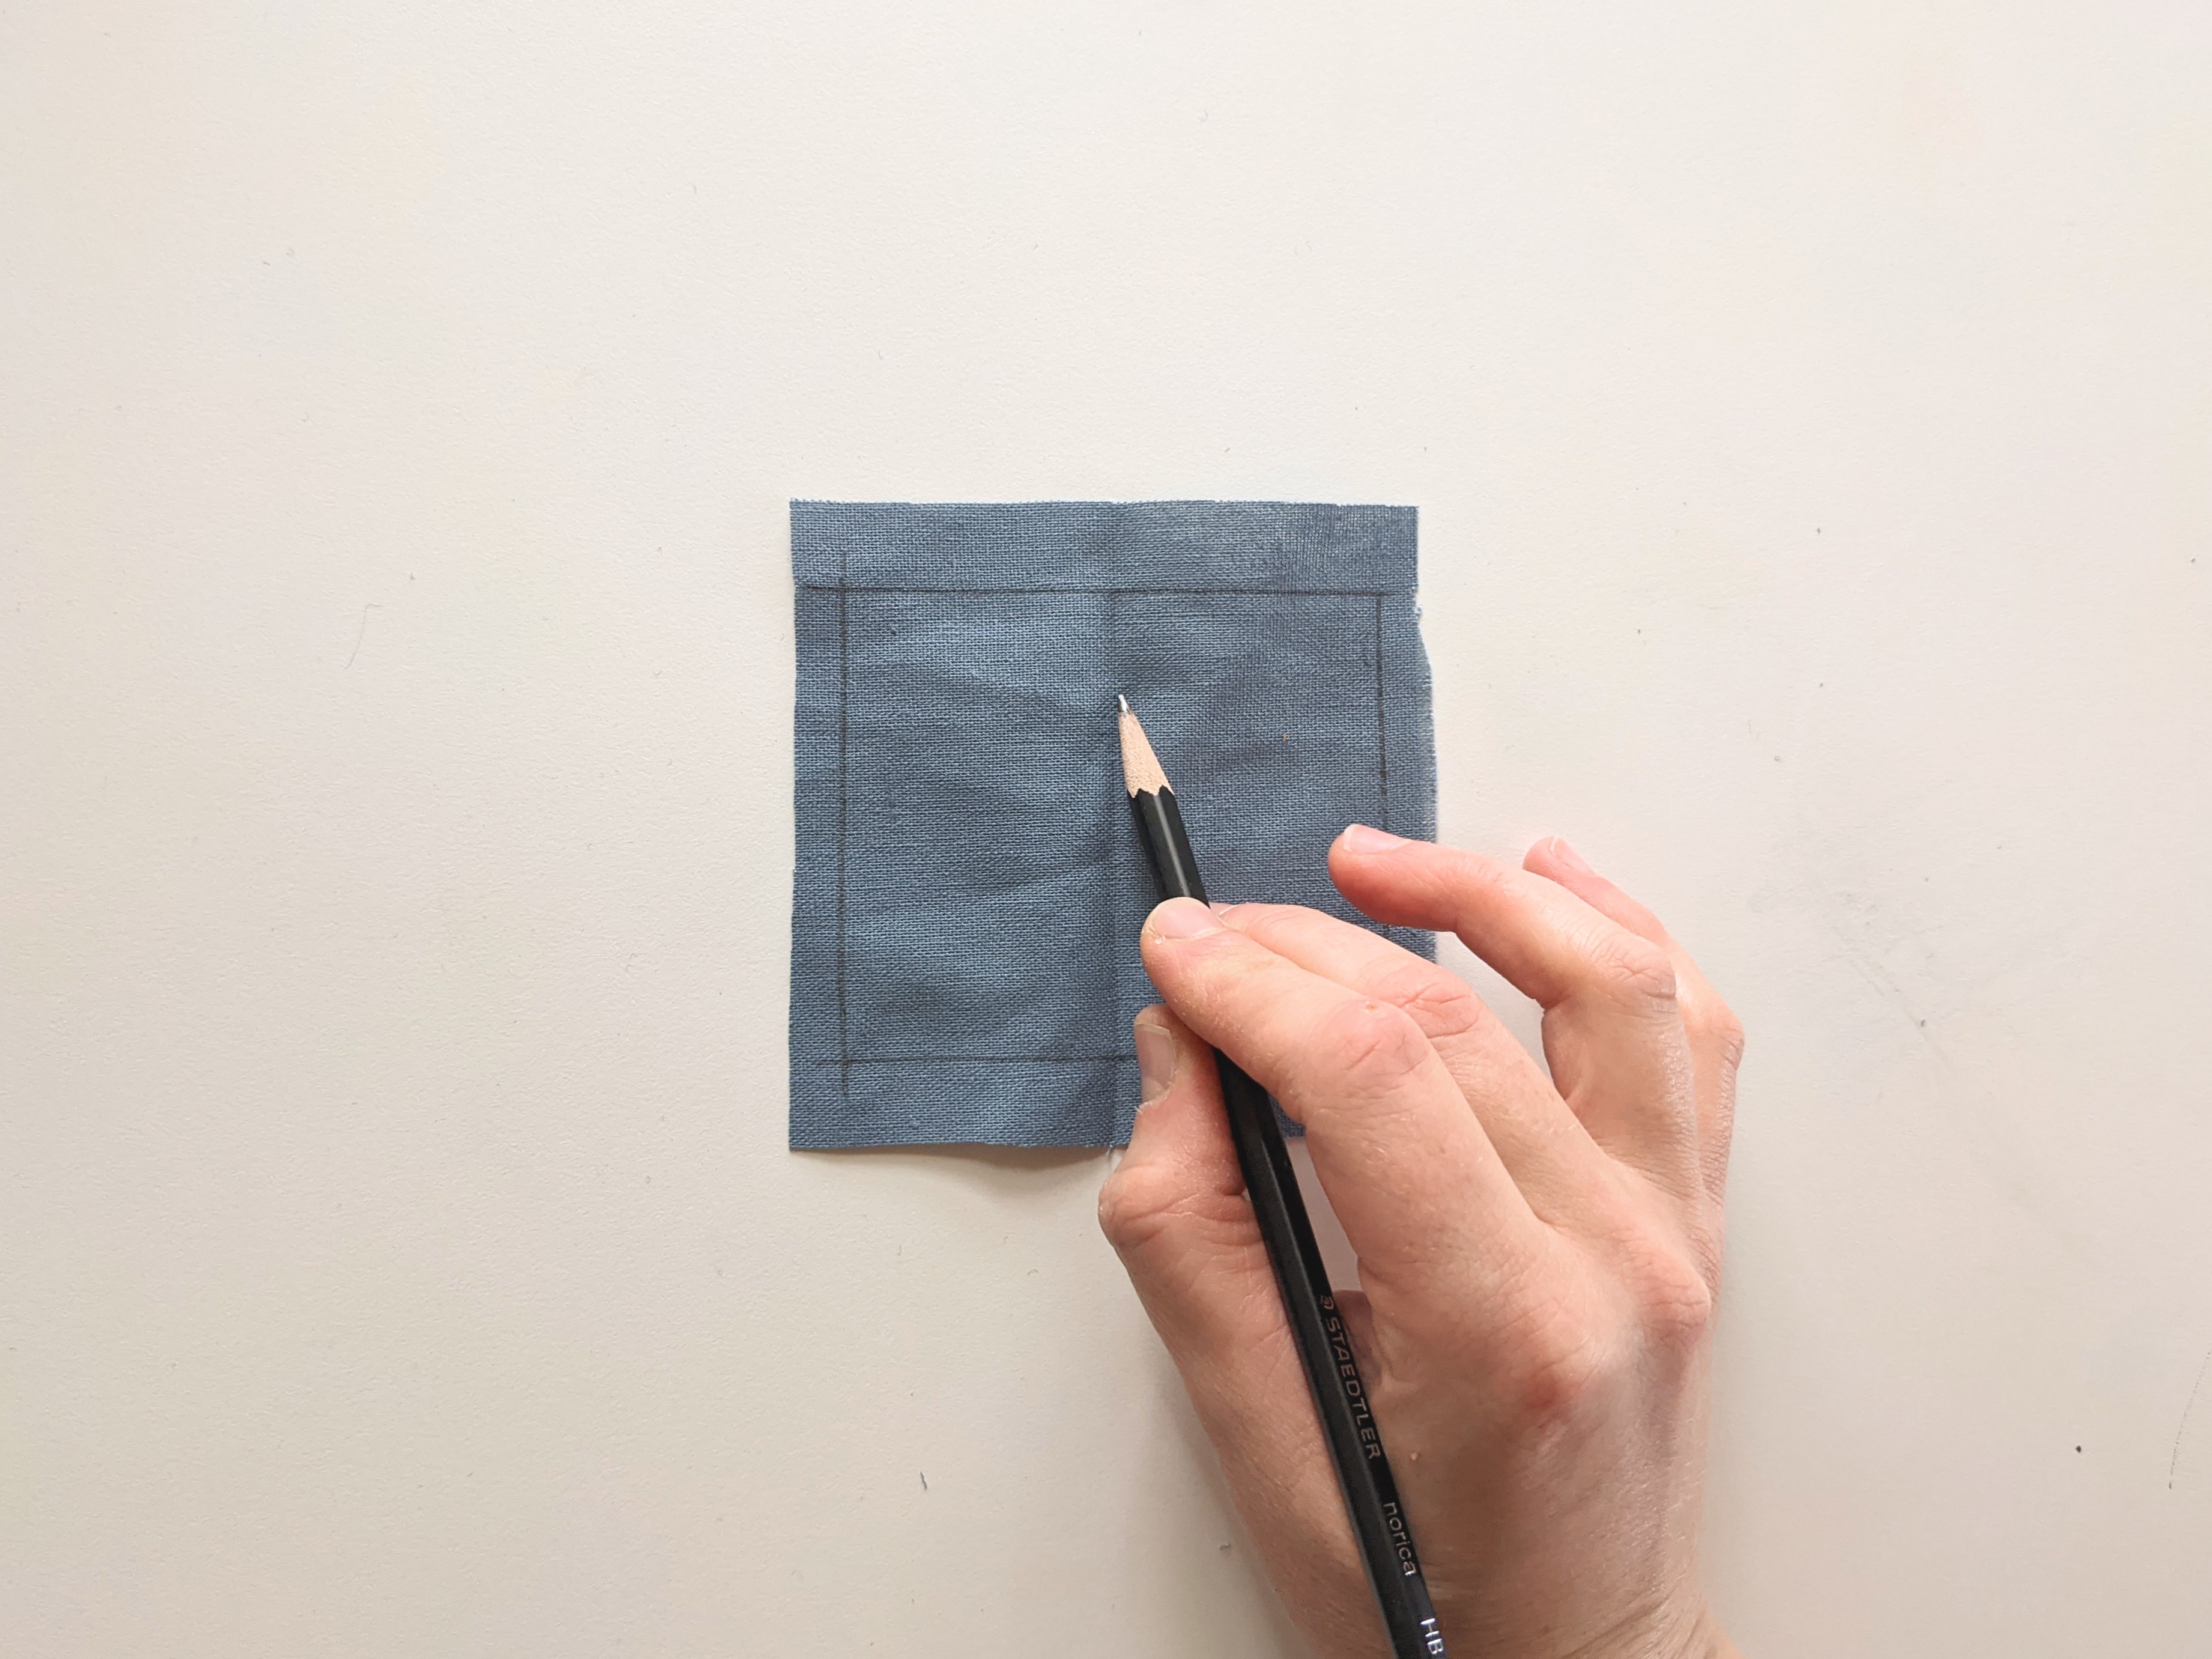
4. You can find the exact centre by folding the fabric in half.
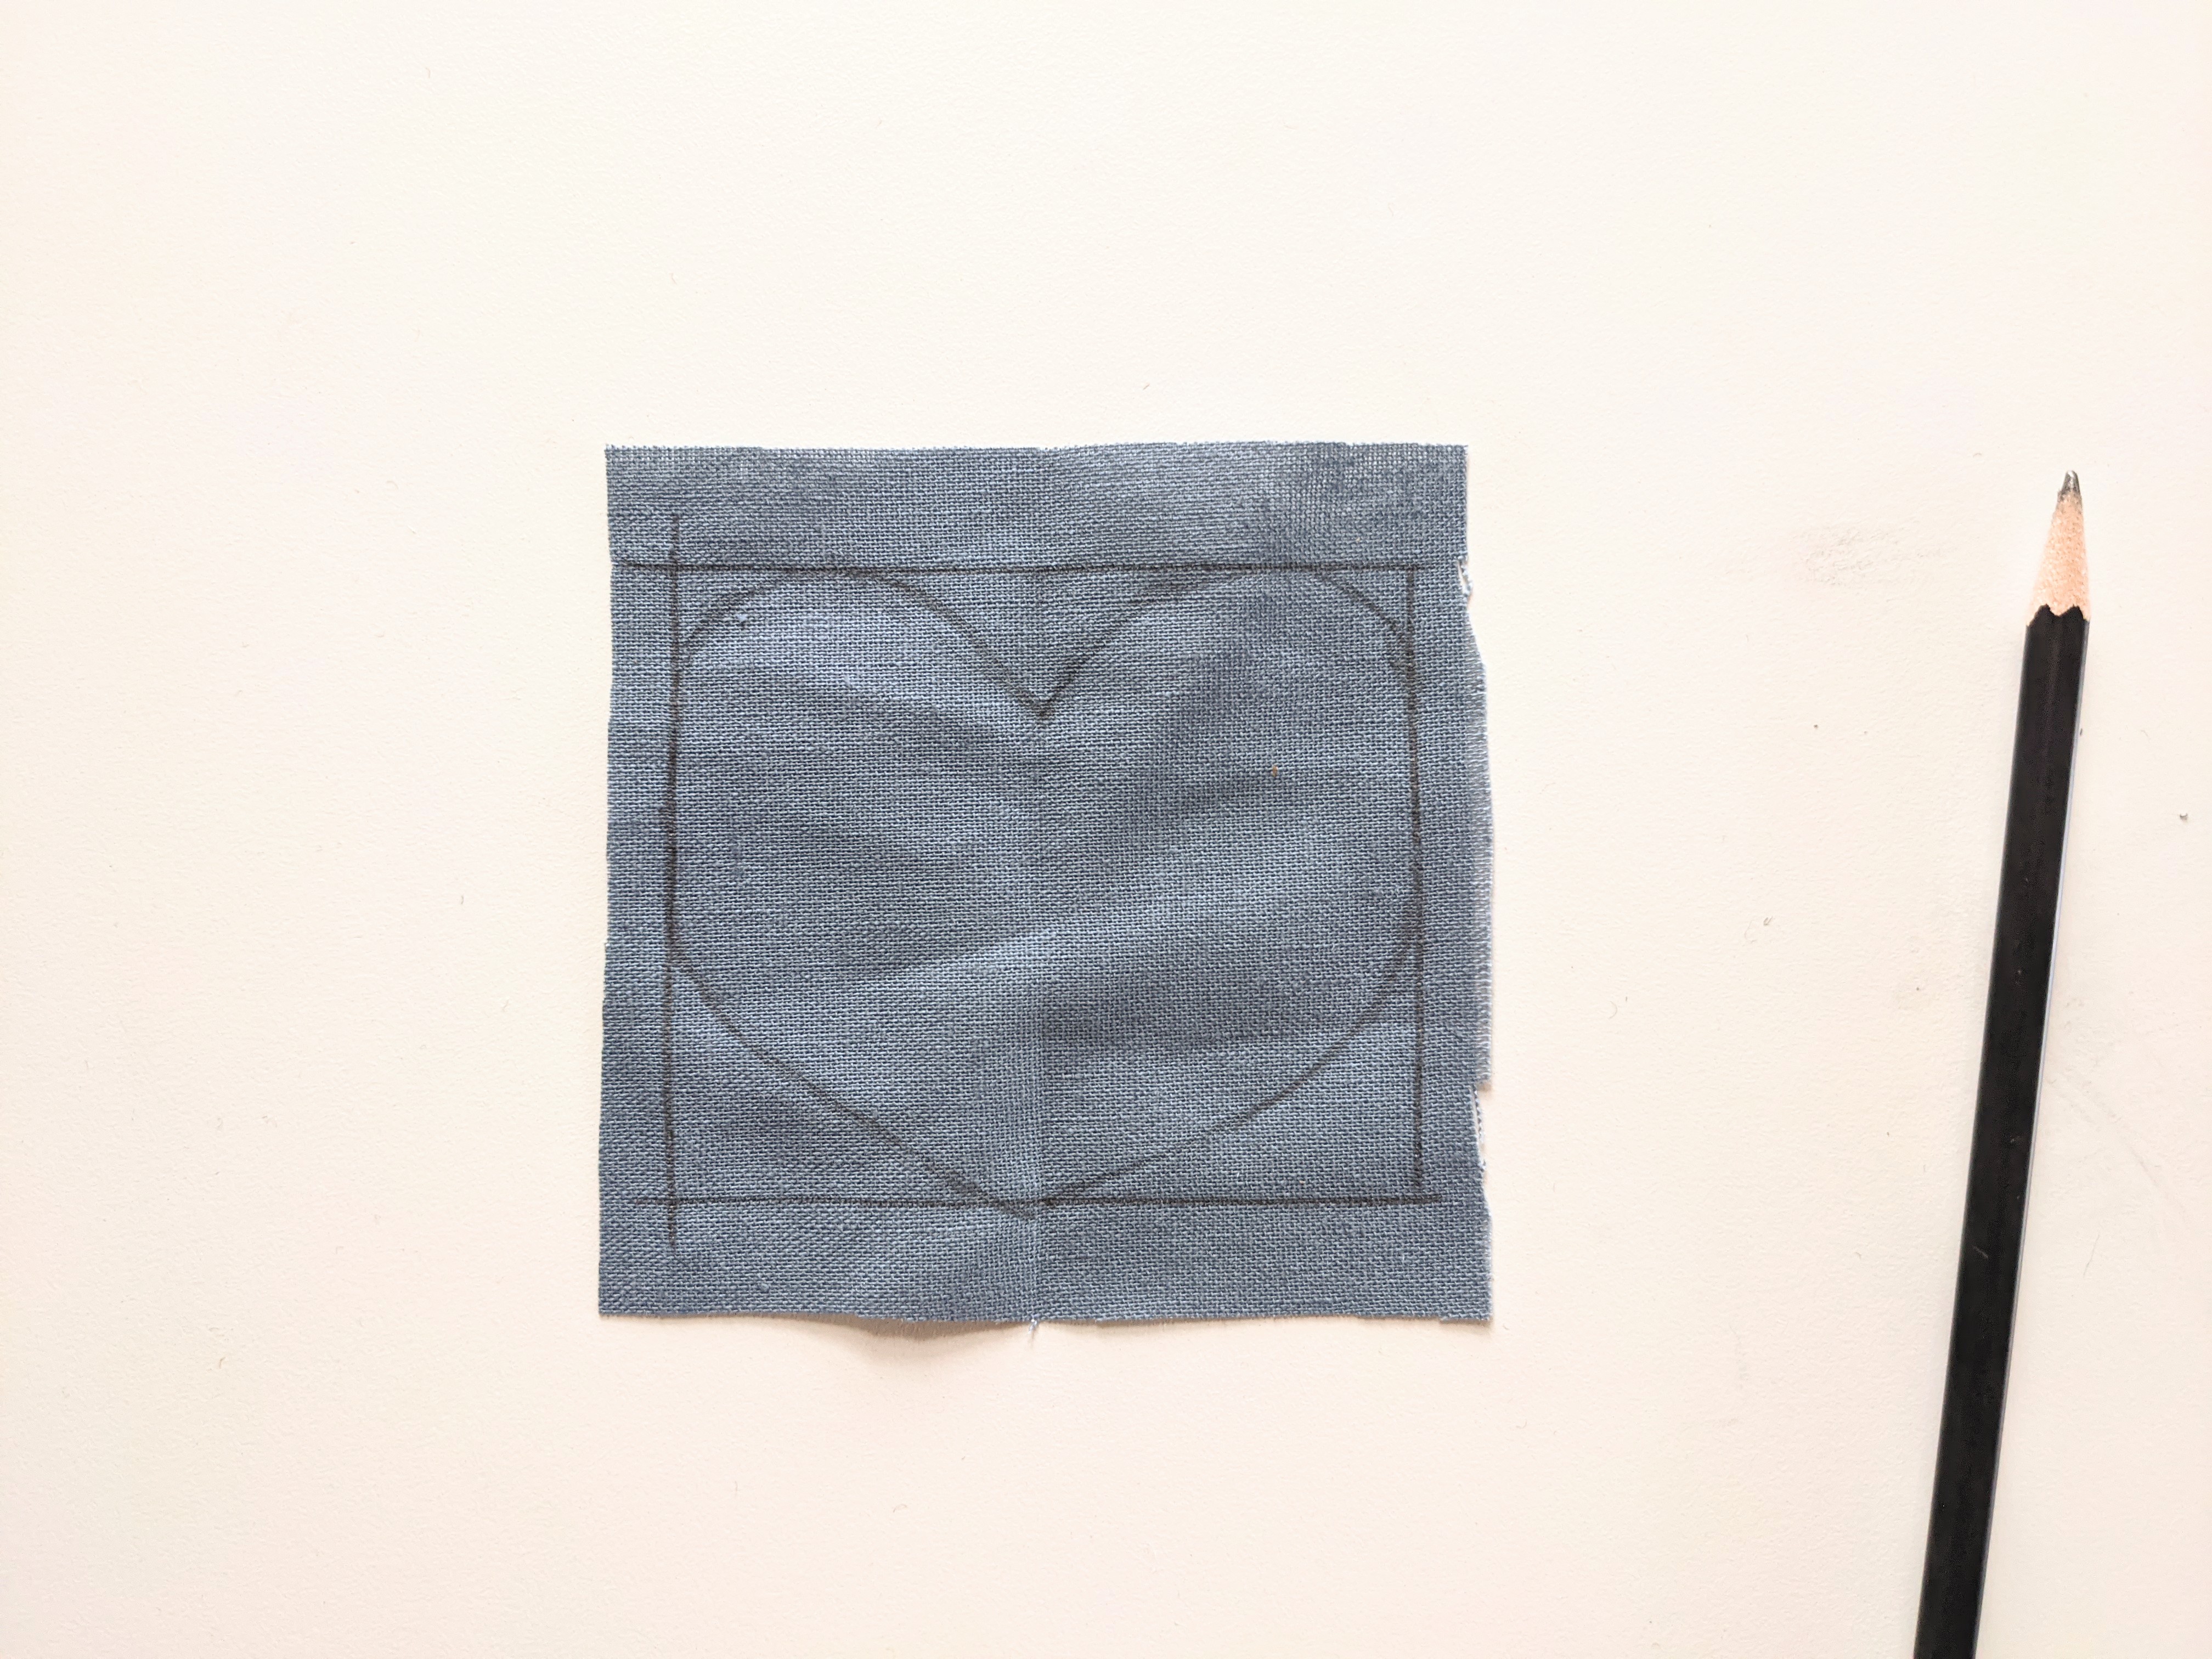
5. Sketch the heart within these parameters.
6. If you are using a woven fabric that would easily unravel on the edge if left raw, follow the next step; otherwise, skip to step 8.
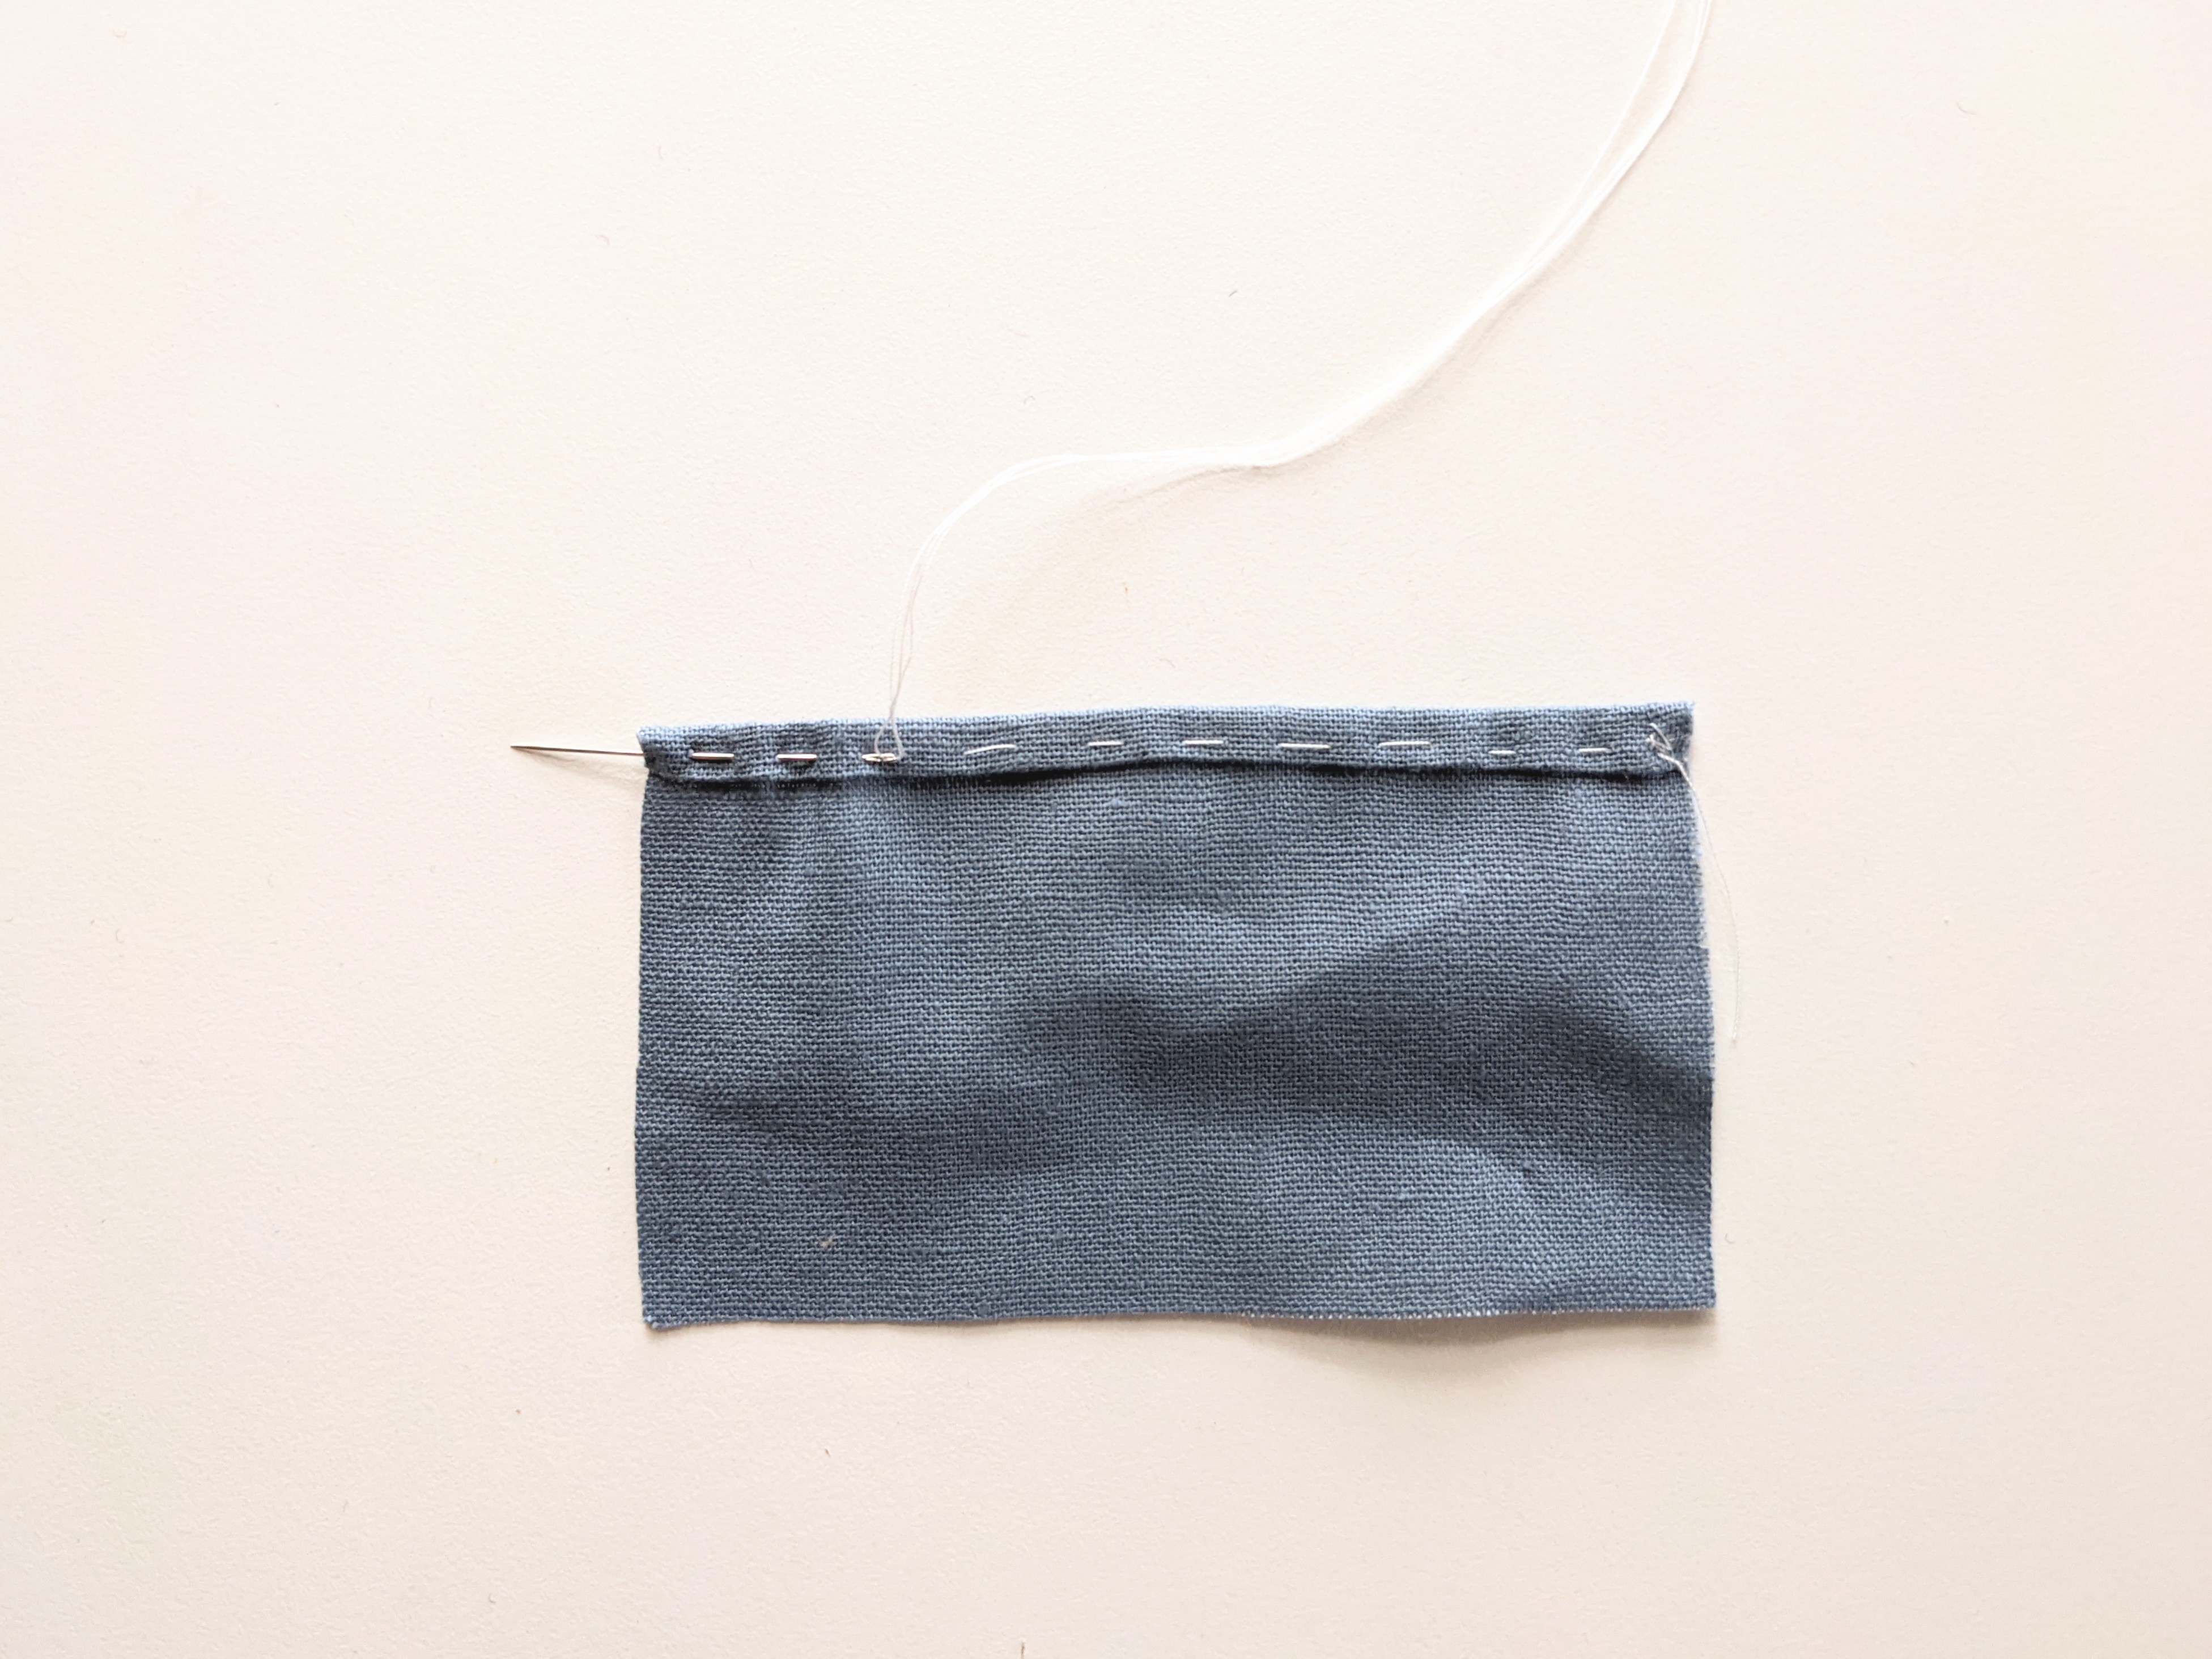
7. On the top 4" edge of the rectangle, fold a scant 1/4" over, wrong sides together, then fold over another 1/4" to hide the raw edge. Using a running stitch, sew this folded edge in place. You can use a sewing machine instead of hand stitching.
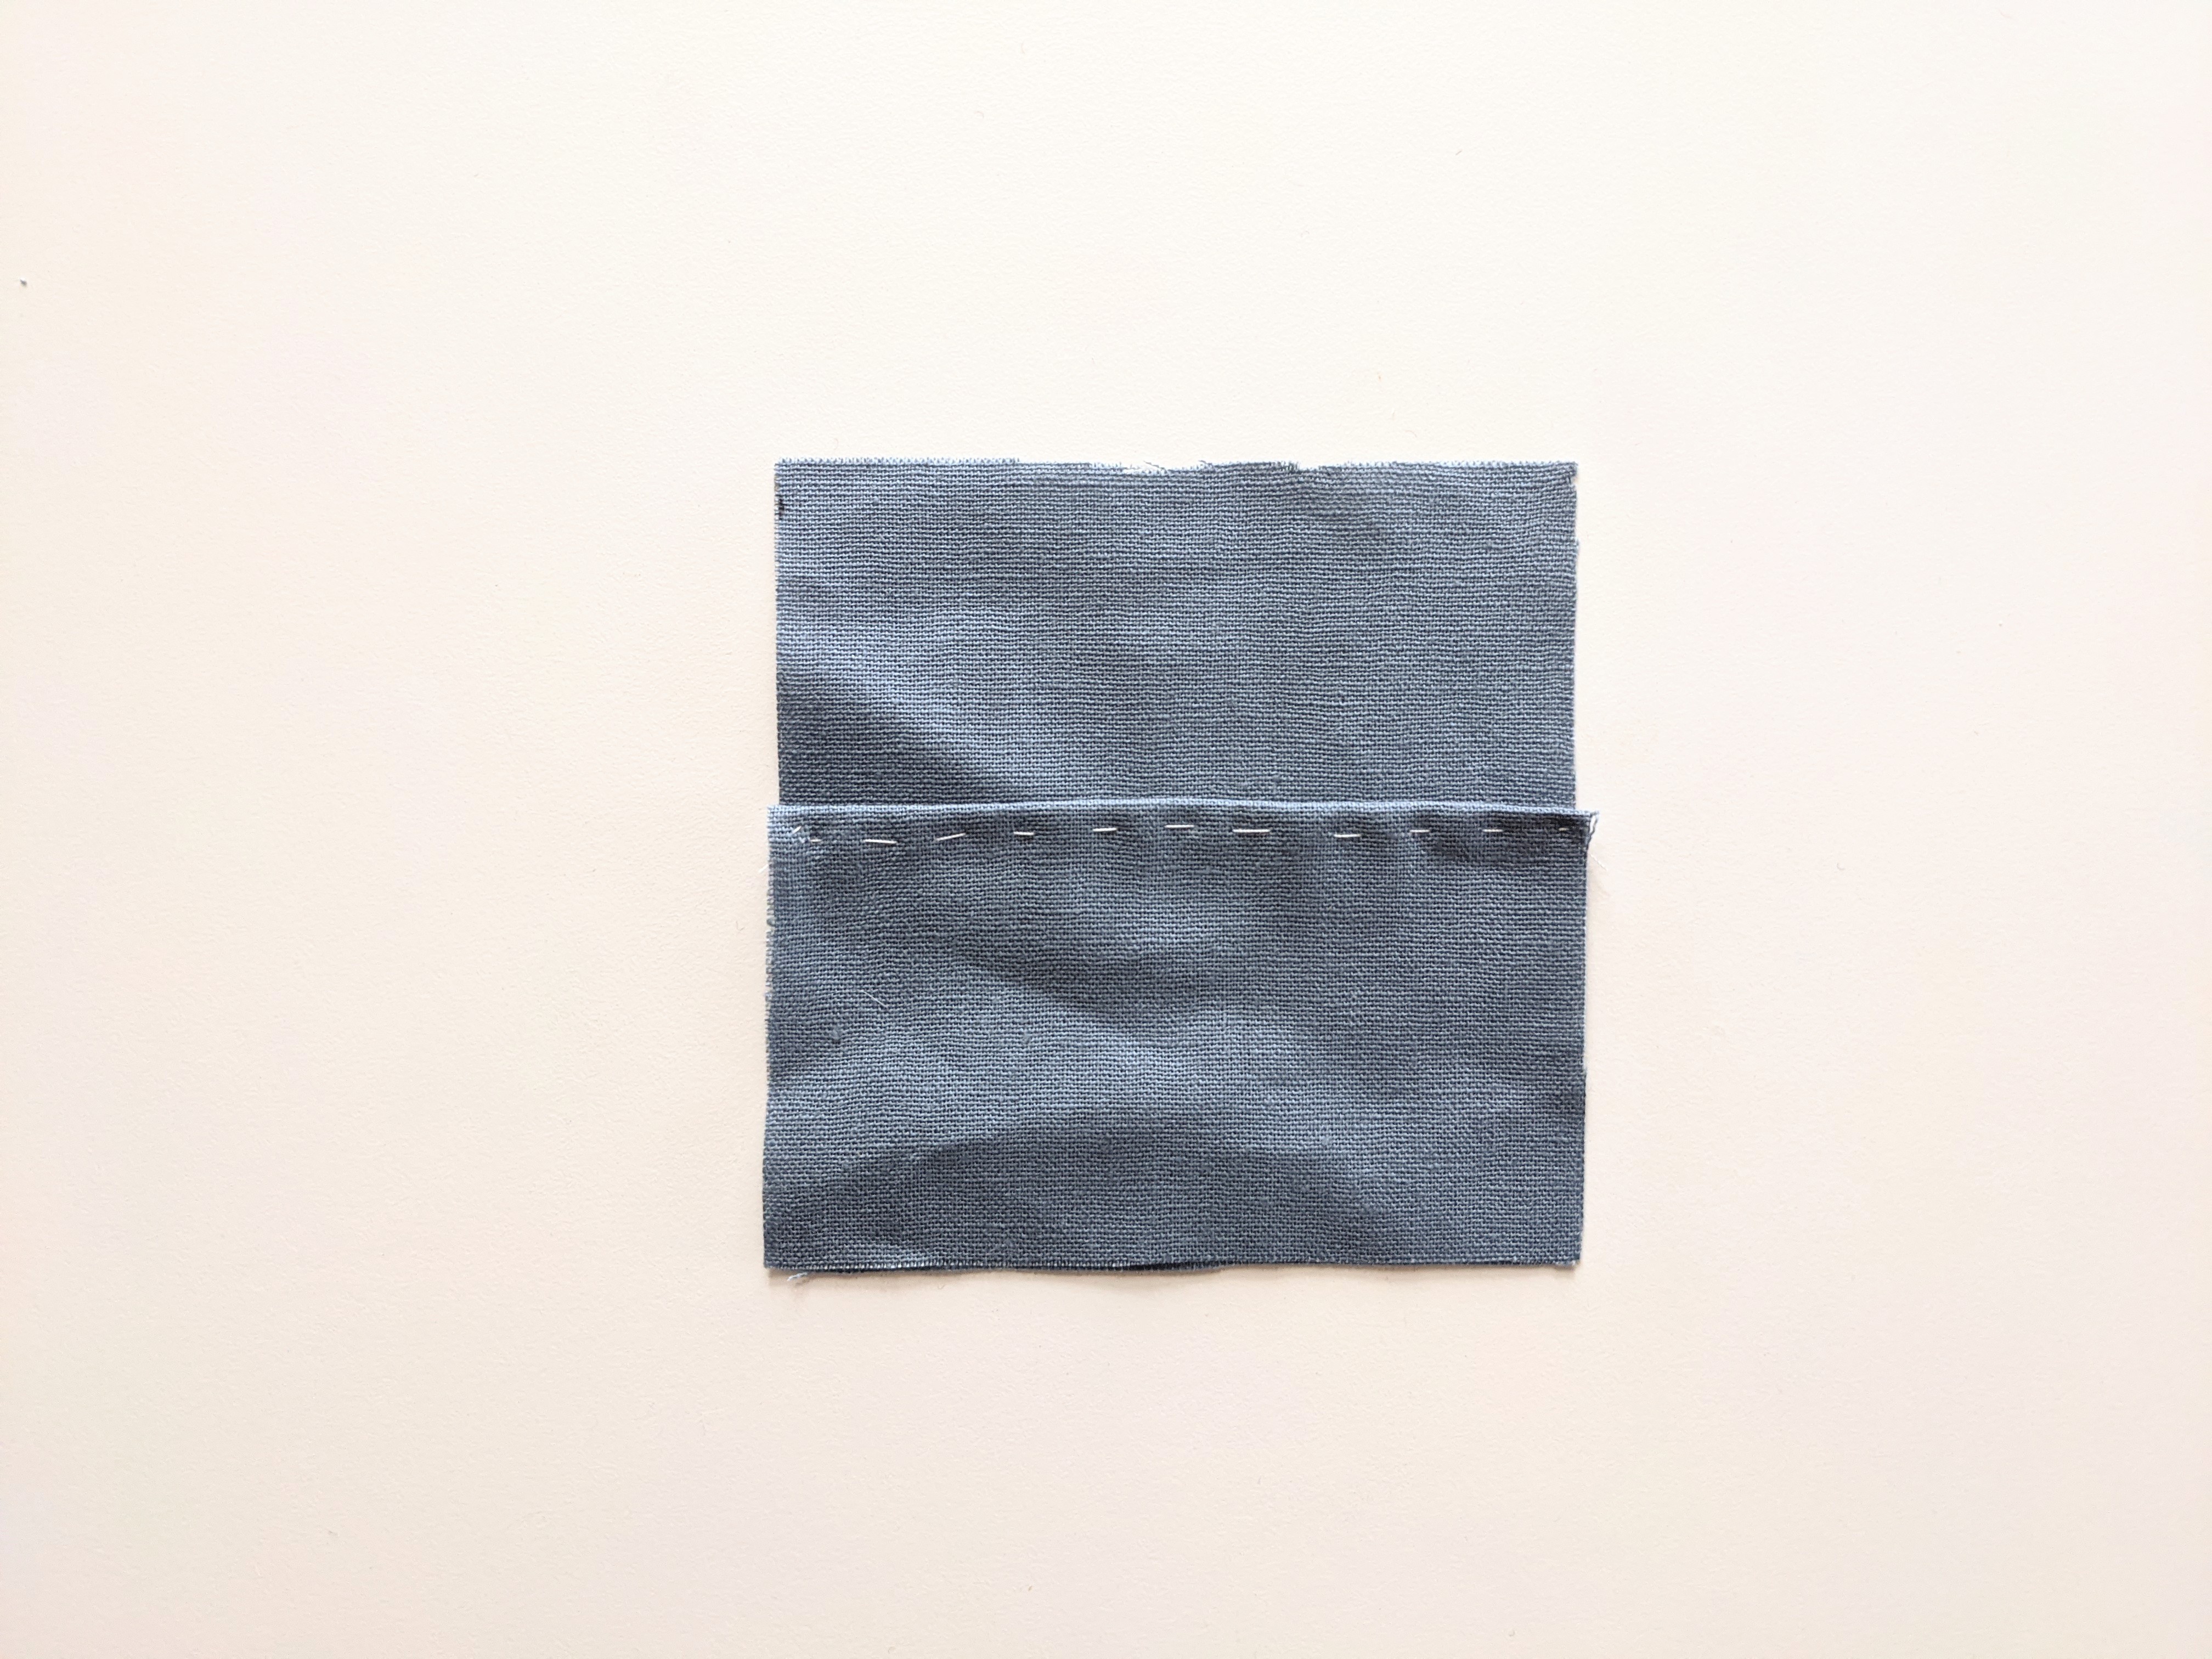
8. Place one square right-side-up on your workspace. Place the rectangle right-side up as well, on top of the first square with bottom edges lining up. Then place the second square right-side down on top of the other two pieces, with all three bottom edges lining up.
9. Mark two notches about 1.5” apart, making sure it is .5” above the bottom point and at least .5” below the edge of the middle “pocket” fabric section. You may wish to use some sewing pins to hold the three pieces together.
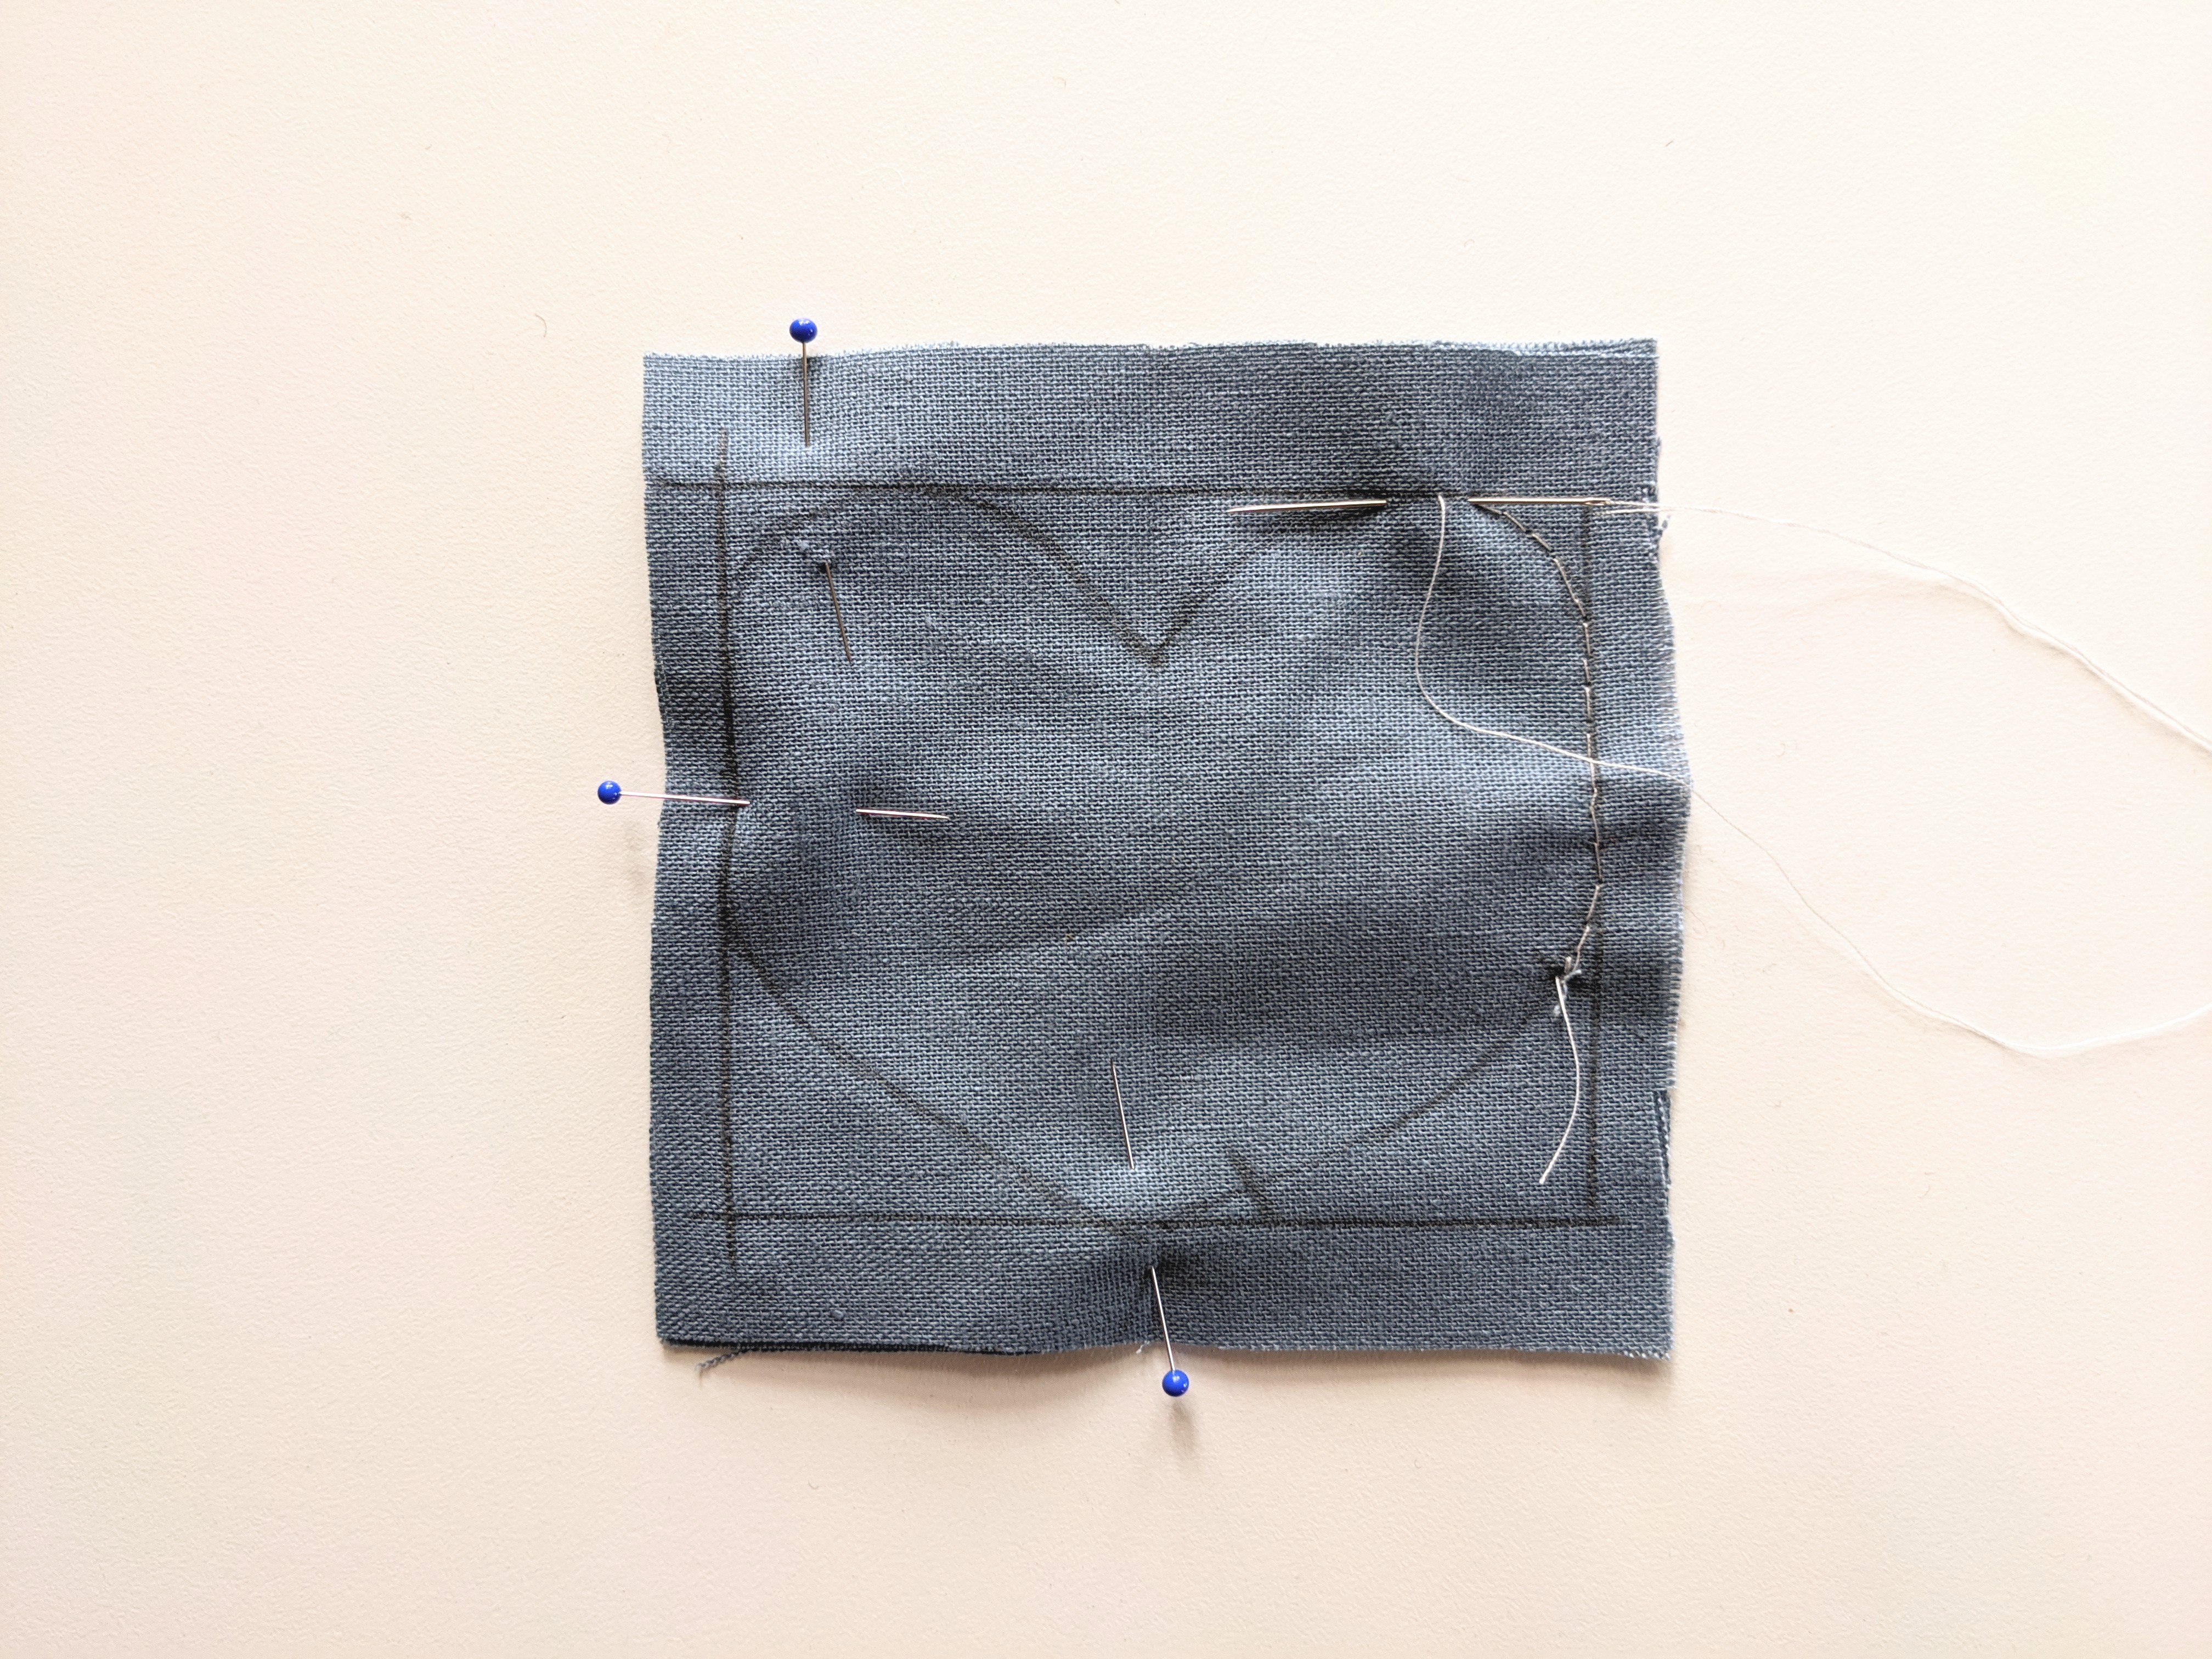
10. Starting at the top-notch, backstitch around the heart to the bottom notch. Unless you made exceptionally small stitches the first time, you should go over your seam a second time. You could also use your sewing machine here instead.
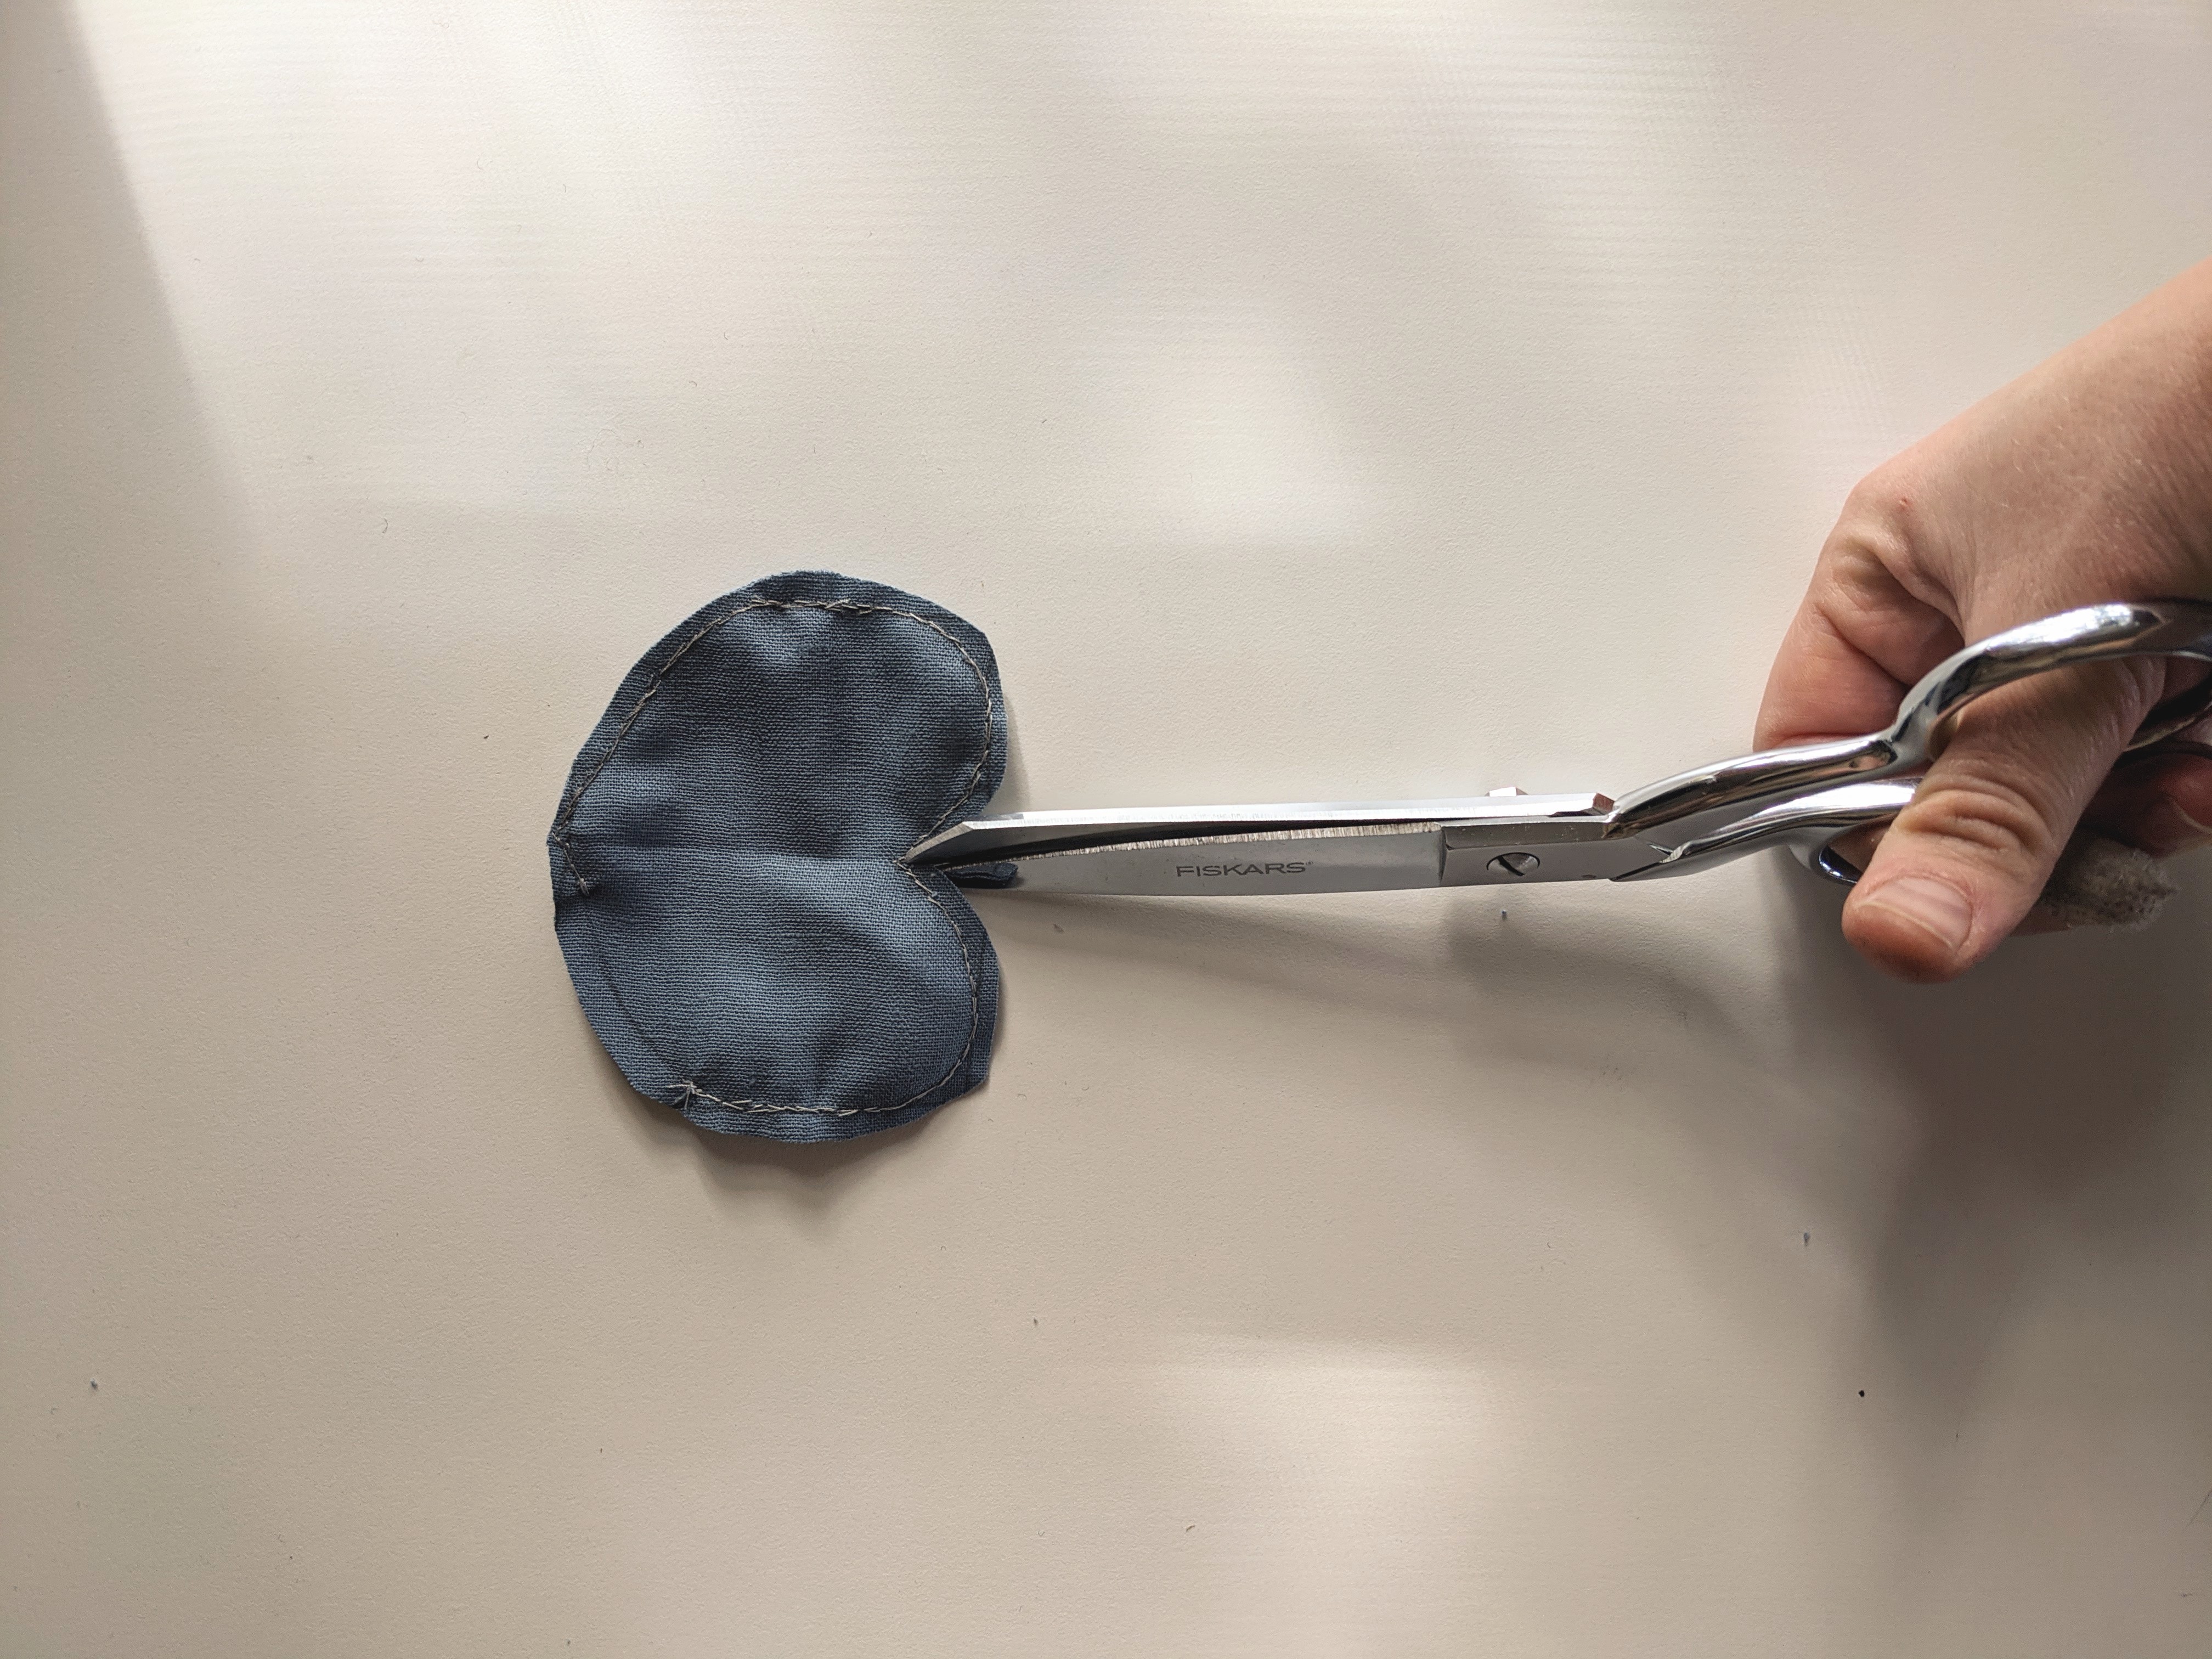
11. Cut around the heart, leaving a ¼” seam allowance. Being careful not to cut through the stitches, cut close to the bottom point (this will give you a more defined point) and cut a slit close to the dip at the top of the heart.
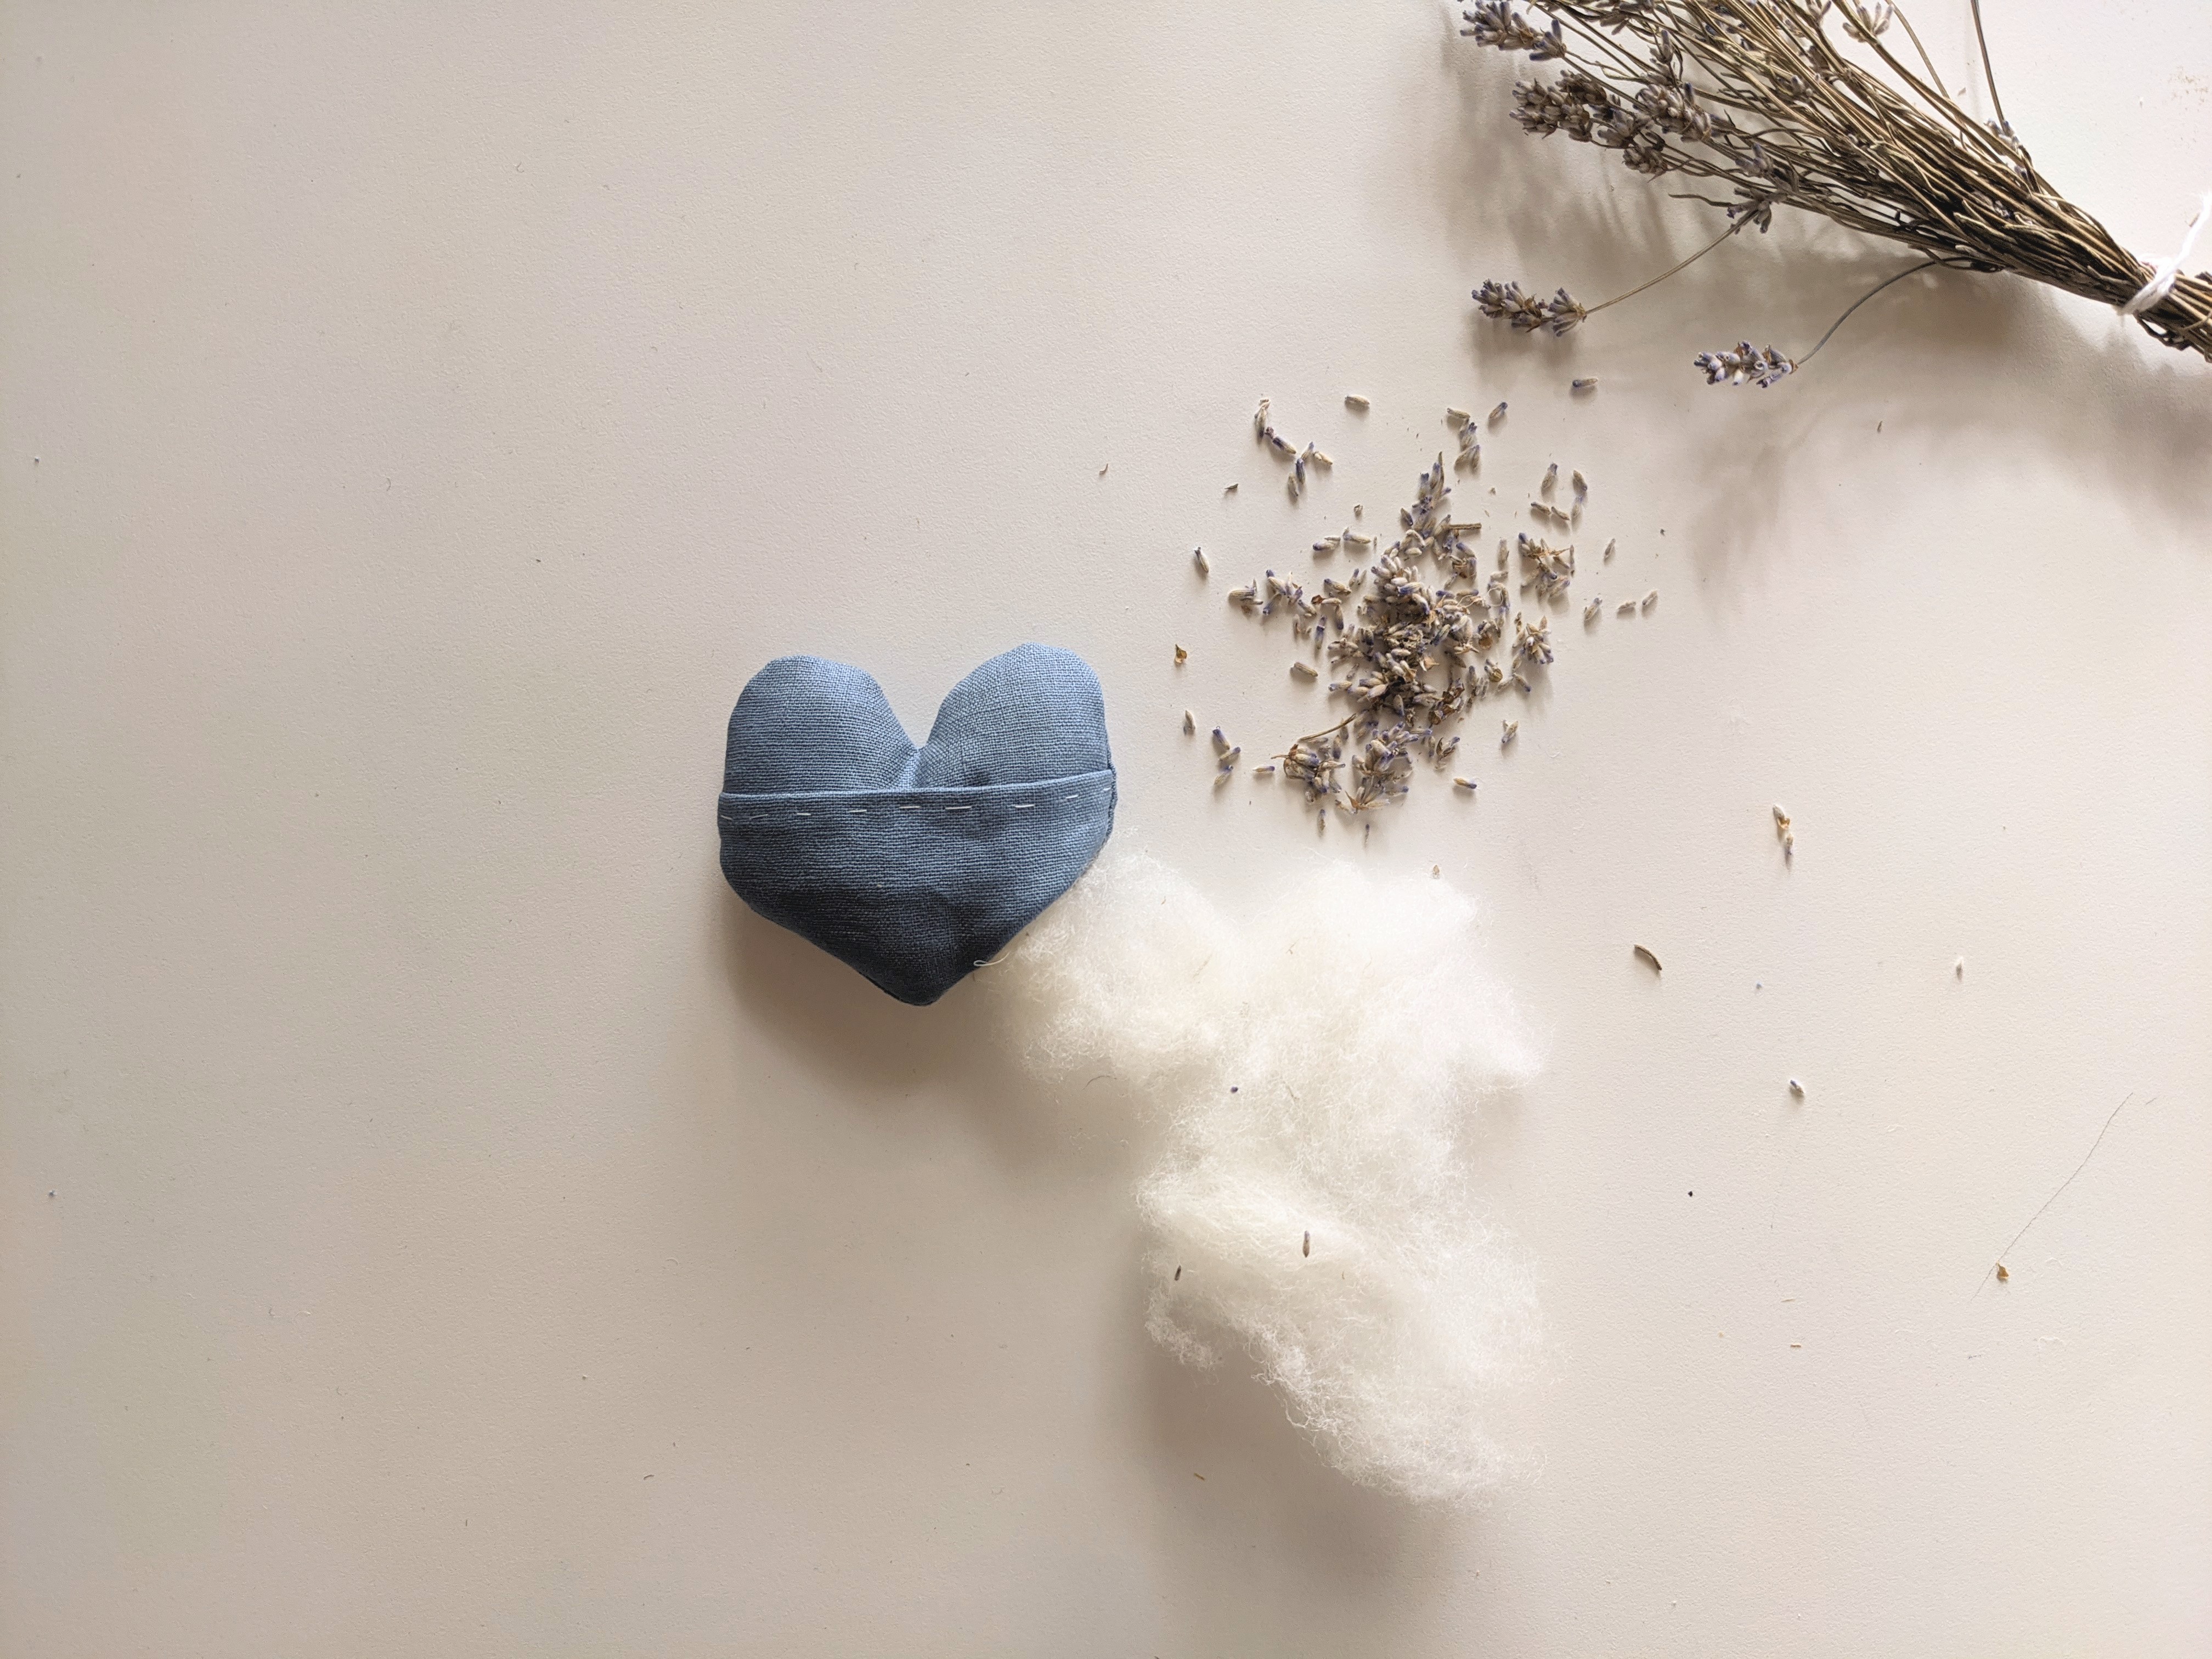
12. Holding the bottom section of fabric and the middle pocket fabric together, turn the heart inside out. Stuff the heart with your choice of material (wool, fabric scraps, lavender, etc.)
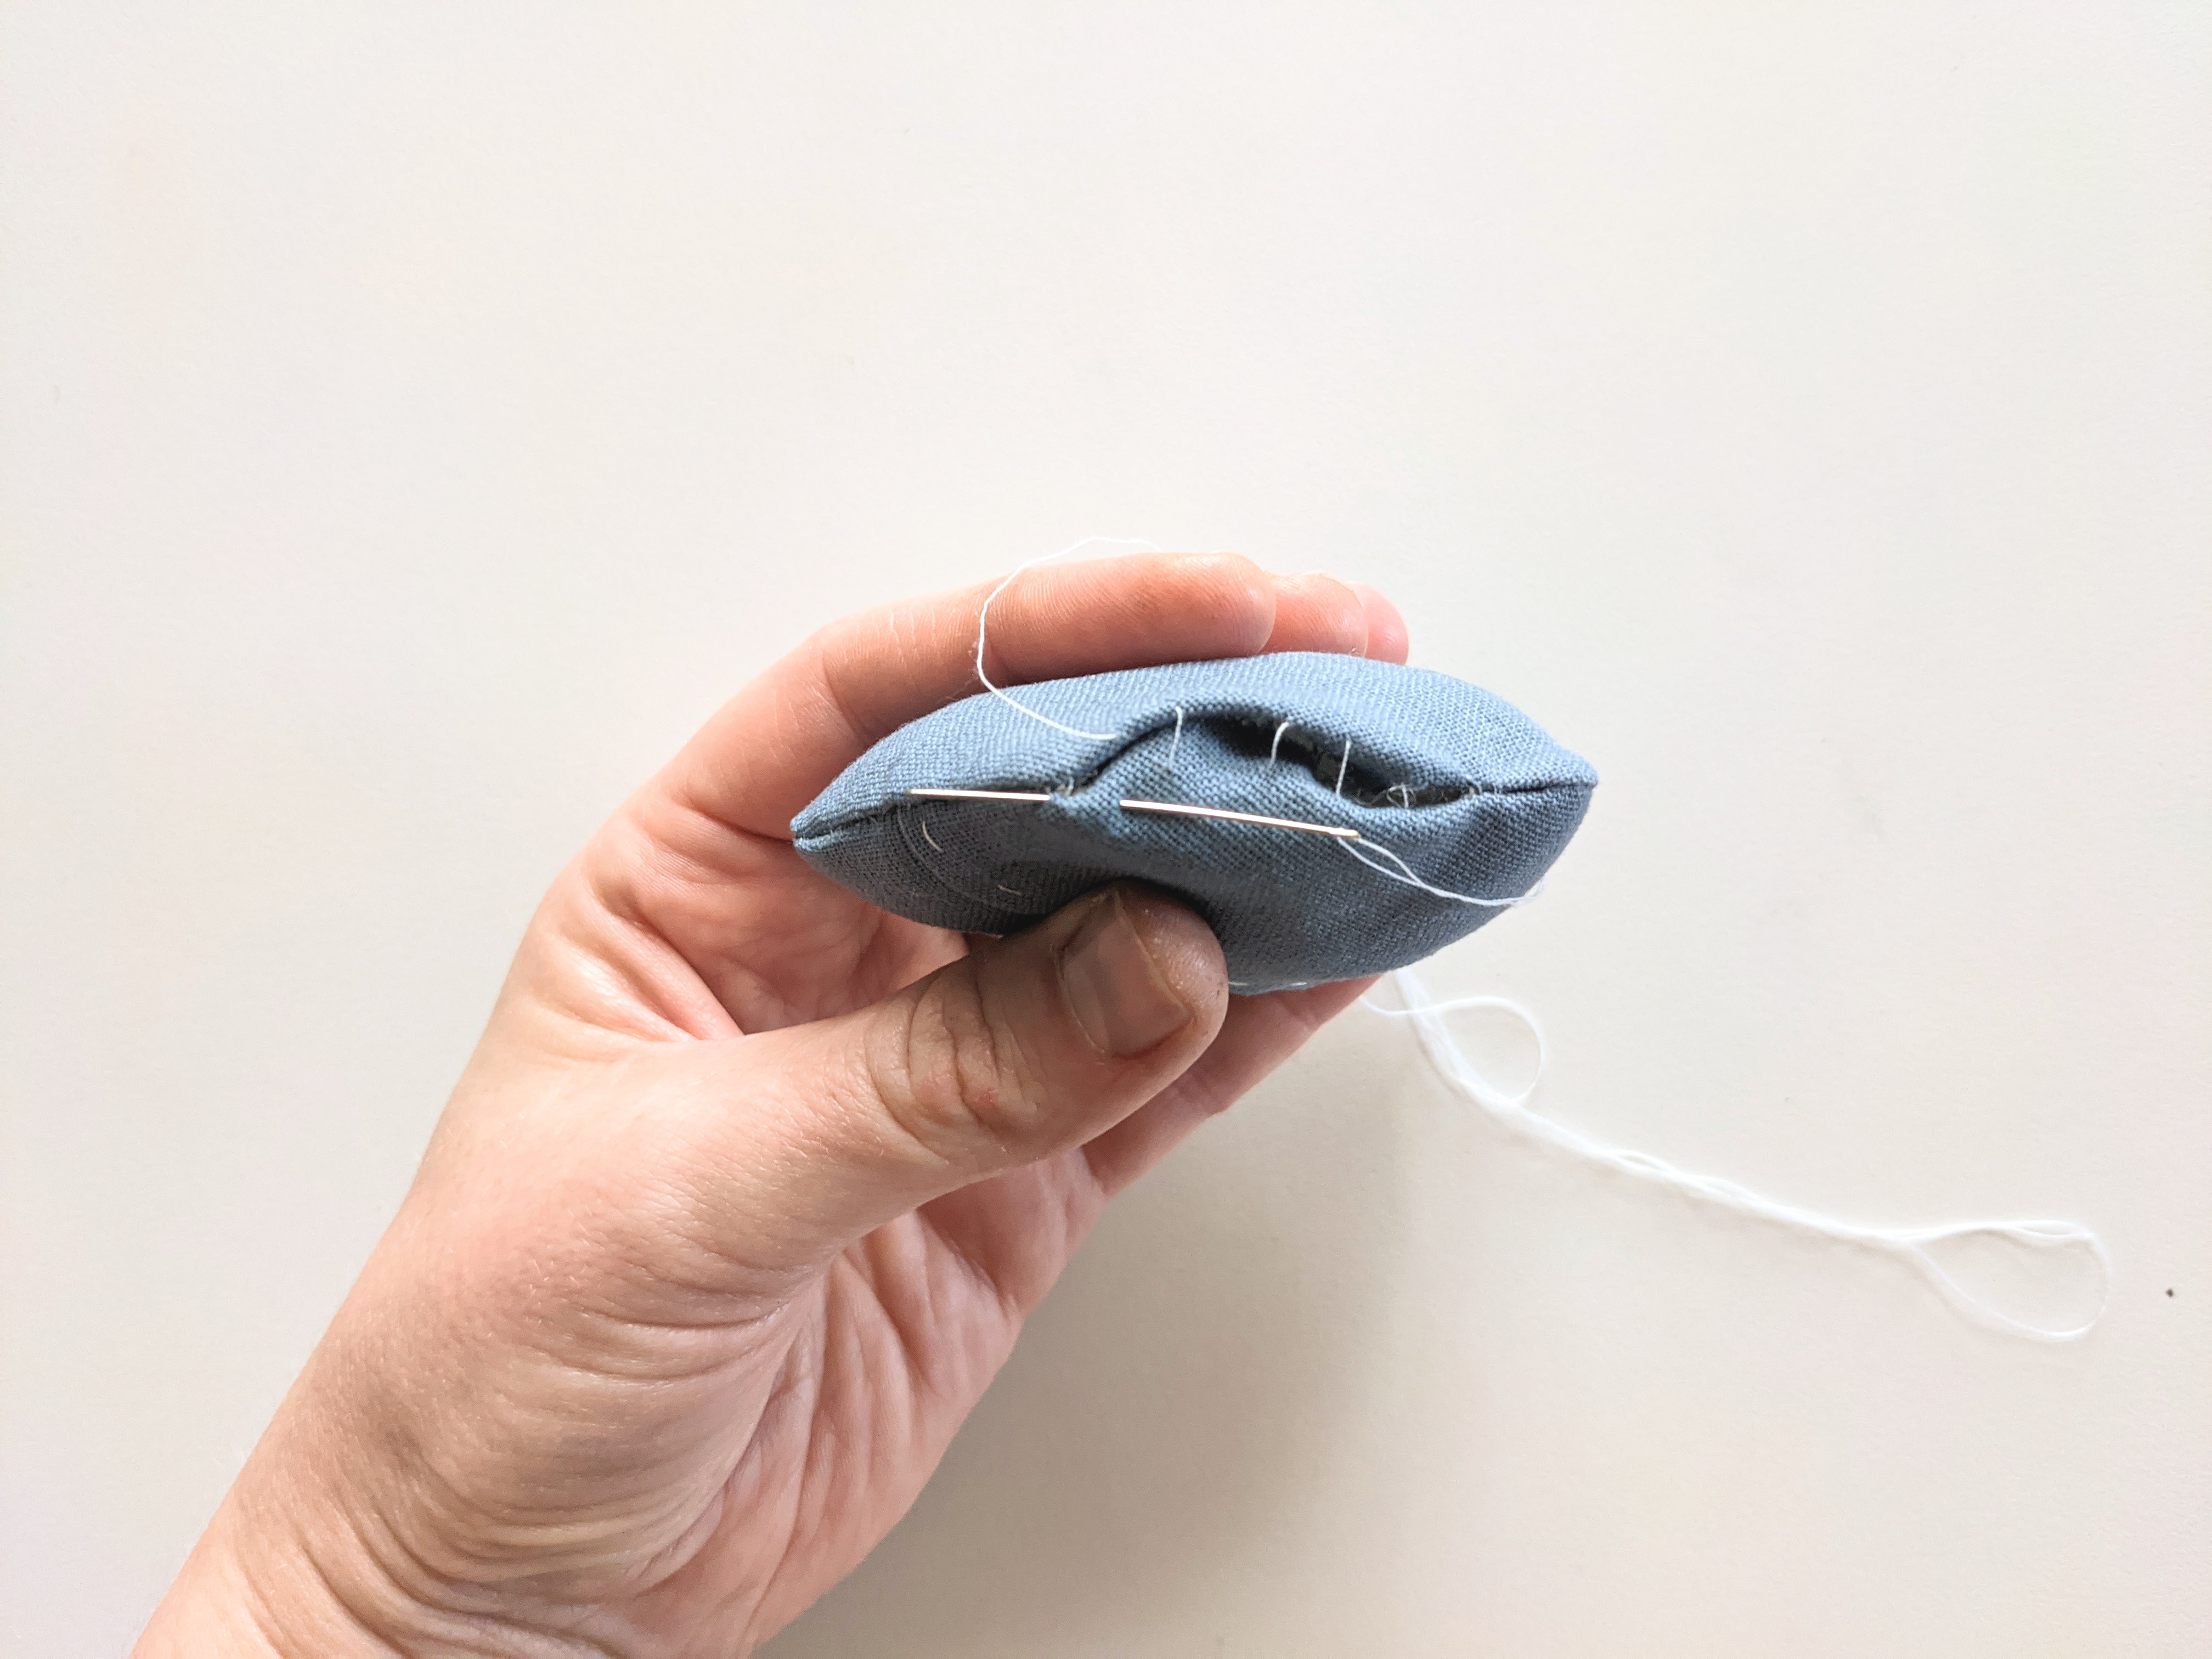
13. Fold the raw edges of the opening inside at ¼”, then use a ladder stitch to close the seam.
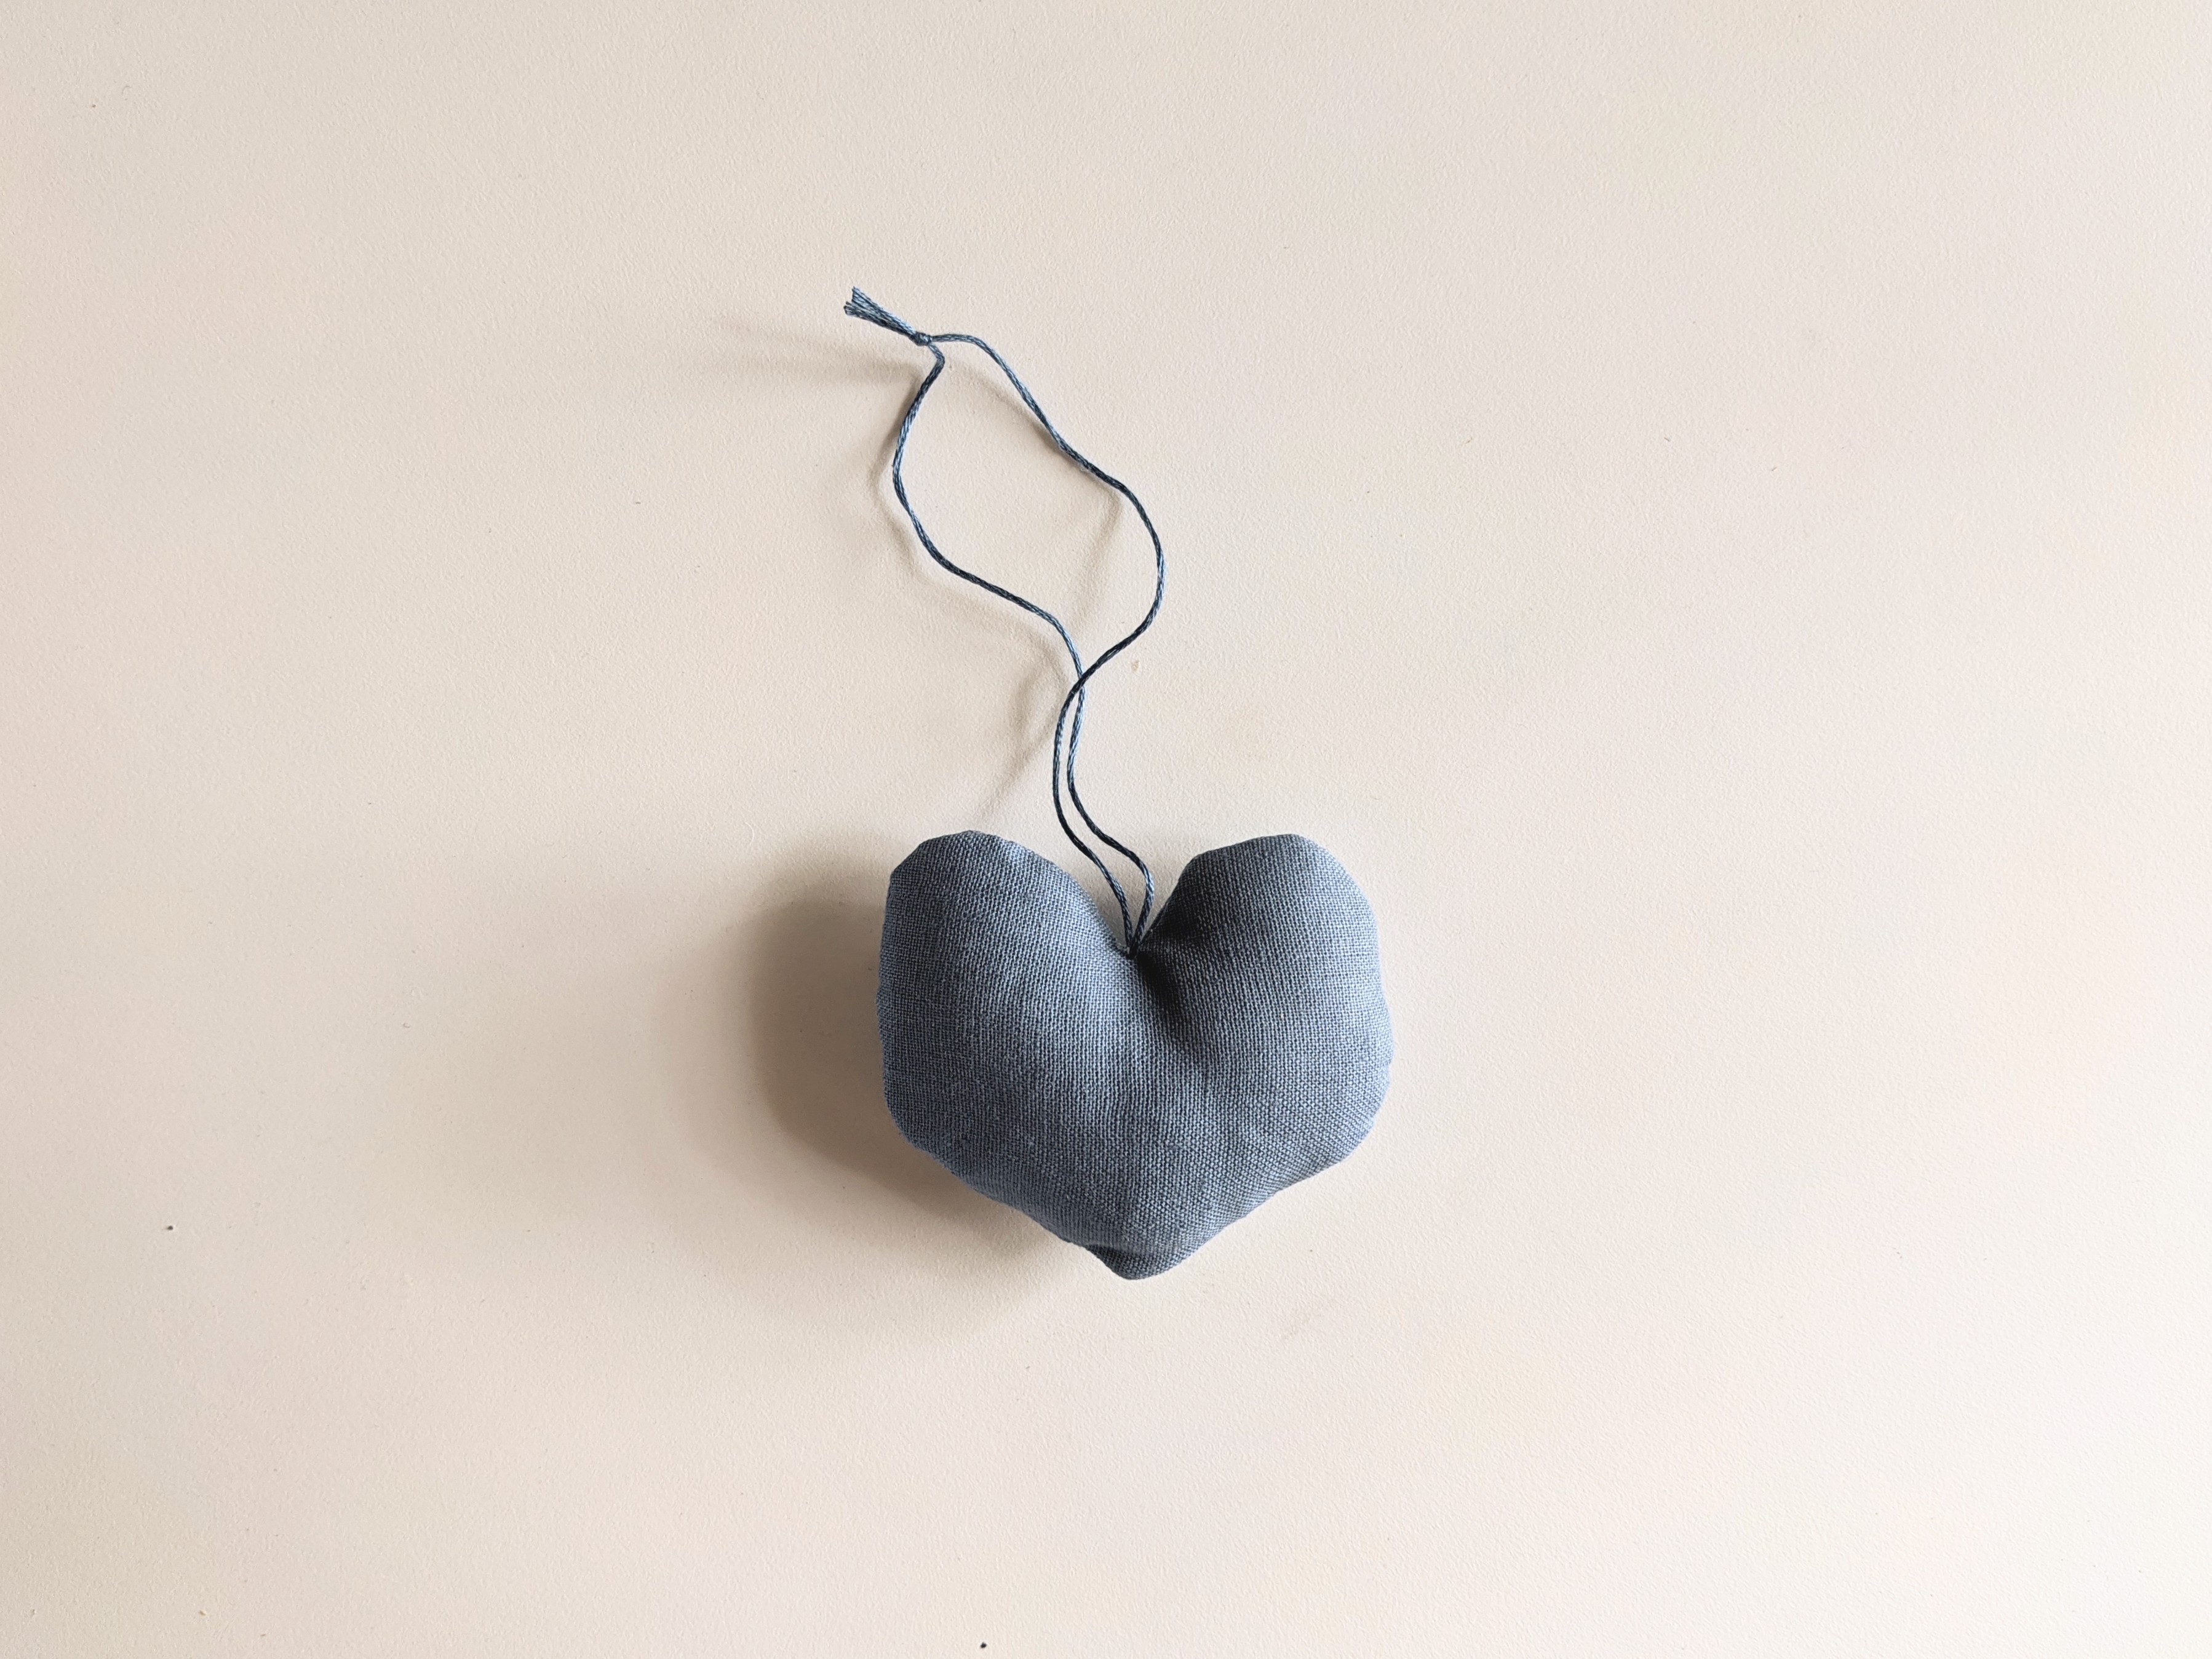
14. If you wish to make this an ornament, cut a length of a string in your choice of coordinating colour and thread it through a couple of millimetres from the top dip of the heart shape. Tie a knot to make a hanging loop.
You’ve finished your little heart pocket charm!

(If you want, you can even add some embroidery)
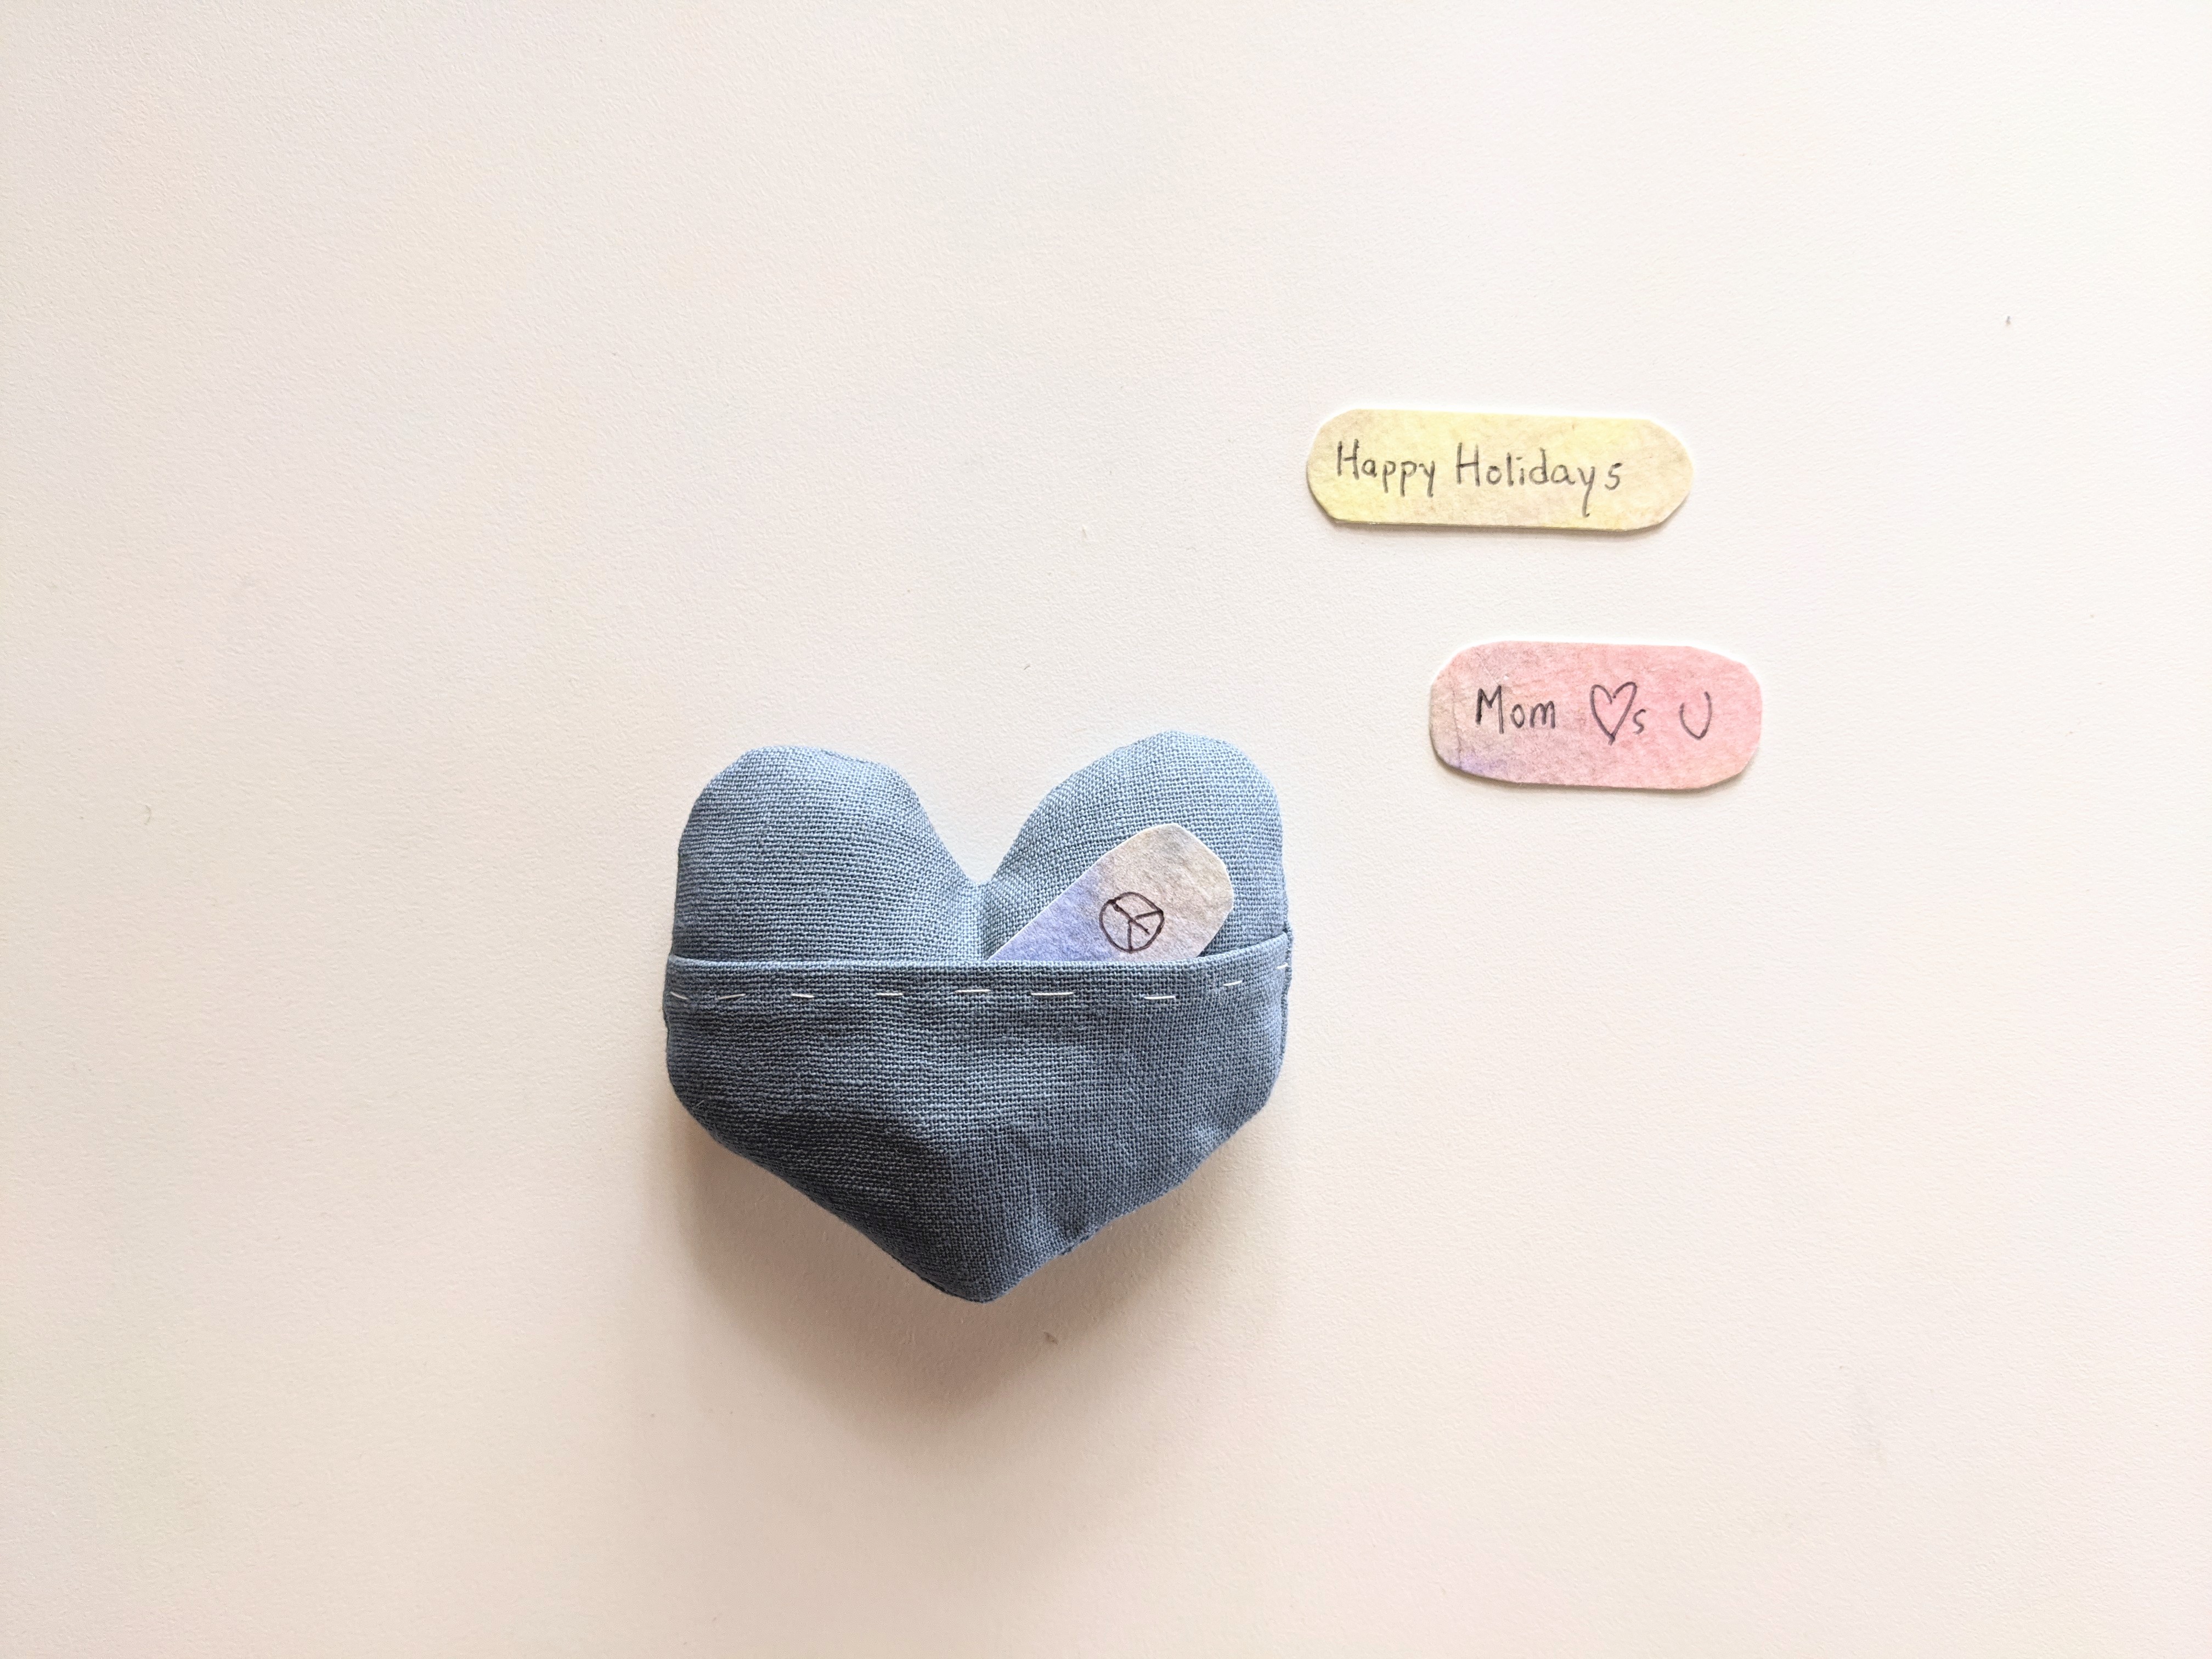
Now write some sweet little notes for your special someone!
We hope you enjoyed this thoughtful DIY; please tag us @ecoparent on social media to show us your unique creations!


