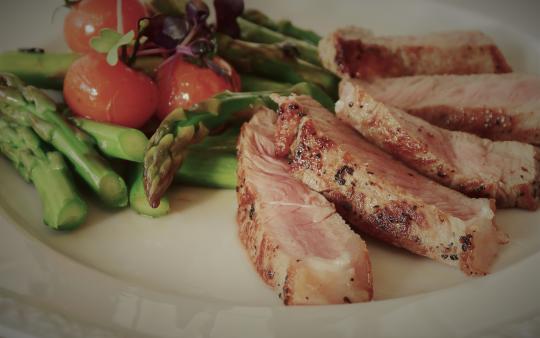
What is it about the colder weather coinciding with a powerful hankering for roasted meat? Even vegetarians aren't immune! Over the course of the last decade, I have witnessed no less than one hundred vegetarians timidly walk through our doors at The Healthy Butcher to venture back into the world of meat-eating. Now, I’m not going to get into a discussion of the merits of eating meat and, full-disclosure, prior to opening our store, my wife and I were both vegetarians! The point that I wish to make is related to the fact that 100% of those vegetarian-to-meat-eating conversions happened in wintertime. I do not ever recall a discussion with a vegetarian about their “first piece of meat” taking place outside of November through March. Could the reason for eating meat in the winter be a primordial instinct to stay warm because of the calories in fat? Or is it relenting to the Ayurvedic notion of agni, when the colder weather demands heavier fare in general? Or is it related to holiday feasting, where a large roast is typically the centrepiece? Whatever the fundamental reason, roasted meat provides comfort and pleasure. In this article I’m going to set out the fundamentals of “dry” roasting, and with these fundamentals you will be equipped to roast no end of different cuts from any variety of meat with ease.
Dry roasting basics
First things first: understand that I am discussing “dry” roasting and not “wet” roasting. Wet roasting is otherwise known as stewing, braising or pot roasting, and means you will cook your meat in a liquid of some sort, like stock or wine. Wet roasting is reserved for the very tough cuts, like beef shank or duck legs for example, because the application of heat via a liquid for a long period of time will aid in breaking down connective tissue. Dry roasting is what you do to all cuts of meat that are reasonably tender. There are four fundamentals which, once you understand them, will allow you to conquer any roast – from a small beef roast for two, to a whole chicken, to a leg of lamb, and so on.
Select good quality meat and season
If you start with inferior meat you will end with an inferior roast. Try to purchase quality, organic meat from a local butcher rather than a national supermarket chain. For beef, choose the loin and rib cuts (top sirloin, tenderloin or prime rib). For lamb, the leg is premium, and pork tenderloin is best for dry roasting. Seasoning shouldn’t overtake the flavour of the meat, but it can complement it. Frankly, for good meat, salt and pepper is all you need. Of course, adding some key spices or fresh herbs is how you elevate the roast to a new level.
Meat Terms
- Organic accompanied with the Canada Organic symbol means that the animal has been raised according to high federal standards and the site audited by a 3rd party.
- Look for Grass-fed for ruminant animals (like beef, bison and lamb) but ascertain if the animal was 100% grass-fed. If not, it’s not truly grass-fed!
- Corn-fed and Grain-fed aren’t necessarily positive attributes, especially for ruminant animals like beef or lamb that should be eating grass.
- Antibiotic Free only means that an animal has been withdrawn from antibiotics for a period of time; look for the statement, “Raised without the use of antibiotics”.
- A, AA, AAA and Prime only refer to the level of marbling, or fat, and do not communicate anything about how the animal was raised.
Sear for flavour
Searing is the concept of applying high heat for a short period of time to “brown” the outside of the roast. Until about fifteen years ago, cookbooks would explain that searing helps to trap moisture inside; this belief has scientifically been disproven. Nonetheless, searing still plays a fundamental role in developing flavour.
Generally, searing is done at the beginning. You preheat your cast iron pan or oven to a high temperature (450F), put your meat on the hot pan or in the hot oven and sear for as long as it takes to achieve a browned outside (notice I said “browned”, not “burned” . . . there’s a difference). The bigger the roast, the longer this process will take. There is debate over whether searing is most effective at the beginning or the end of the cooking process, but for someone starting off on the road to roasting mastery, stick to searing at the beginning unless otherwise instructed.
Guide to seasoning meat
When you buy good quality meat, you have already paid for flavour, so go light on the seasonings. That said, a few organic or garden herbs and a sprinkle of Fairtrade spices can elevate the game. Big red meats like beef and bison can take stronger spices like chili, cumin, coriander, mustard and cloves quite well, and you can never go wrong with rosemary and thyme. Pork provides almost a blank slate but look to Asian-based recipes for inspiration. Think fresh for chicken – lemon, ginger, or pesto. Don’t be afraid to experiment, but remember that if you start with good meat, your goal is to complement the flavour, not overtake it. Also, as a general rule, add fresh herbs after searing, otherwise they’ll burn.
Cook at and to the right temperature
After the searing stage, lower your heat. Generally, I like to roast at 325F. The length of time depends on the size of what you’re roasting. How do you know when you’re done? Here is the secret of all secrets to not overcooking meat: USE A THERMOMETER. Buy an “instant read” meat thermometer for $8 and you have forever erased the possibility of overcooking. The temperature you are going to cook to depends on the meat you are roasting. For a beef tenderloin roast, you will remove the meat when it reads 110F versus a whole chicken which will stay in the oven until 160F.
Guide for cooking meat
Beef Prime Rib Roast
Sear in a 450F oven for 20-30 minutes, lower temperature to 325F until the internal temperature reads 125F. Let it rest for 20 minutes.
Boneless Leg of Lamb
Sear on the stove top in a hot pan until nicely browned all over, move to a 325F oven until the internal temperature reads 125F. Let it rest for 15 minutes.
Whole Chicken
Sear in a 450F oven for about 10 minutes, lower temp to 350F until the internal temperature reads 160F. Let it rest for 15 minutes.
Let the meat rest
Resting your roast is essential and the reason is this: resting allows the meat to redistribute the juices from the centre outwards so that the drier outer parts regain their tenderness. So the process is simple – remove the roast from the oven, put it on a plate or cutting board and tent it with foil. How long? It depends on the size of the roast. Larger roasts should rest longer. Your goal is to serve meat that’s still warm and retains its juices when you slice it.
That’s it. Every roast is an application of the same principles. The ingredients will change, but the process will remain a constant. Now, go forth and roast!


